At the dead bottom of the gundam grunt totem pole, below the lowly Zaku II and practically harmless GM, there lays the most ill-fated clump of mass-produced metal – the RB-79 Ball. Being just as unintimidating as its own name, the Ball is practically useless on the battlefields of the One Year War (from the original Mobile Suit Gundam). Nicknamed the “Mobile Coffin”, these low-cost civilian crafts modified for battle are famous for their penchant to explode.
Because the Ball is unimpressive in virtually every respect in the anime series, the release of the Master Grade Ball ver. Ka in 2004 must have been an immense surprise to Gunpla fans at the time. “Surely there must be worthier candidates for the MG treatment,” they pr obably thought. However, after the initial shock, I’m sure most fans have come to love the little round underdog for a few reasons: it’s amazingly detailed, it’s deceptively large, it’s attractively priced, and it’s refreshingly different.
First Glance
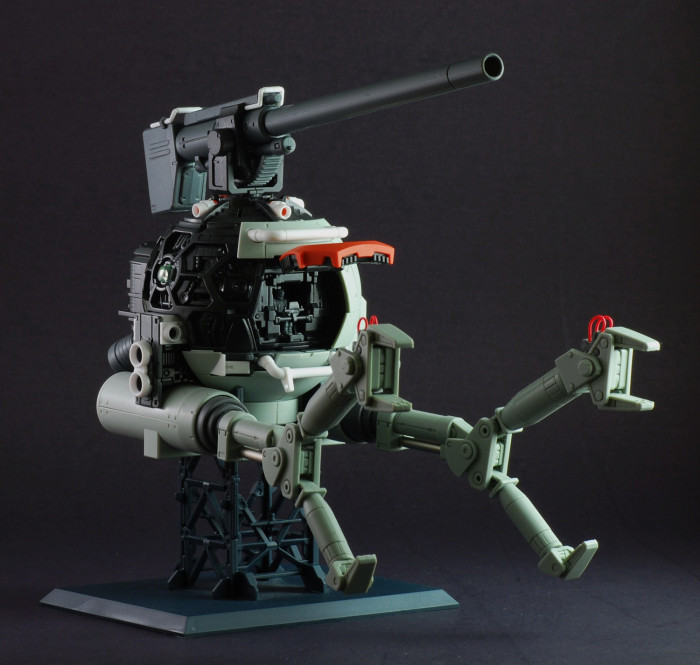
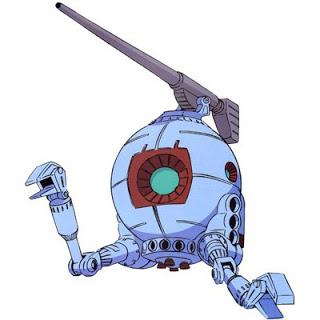
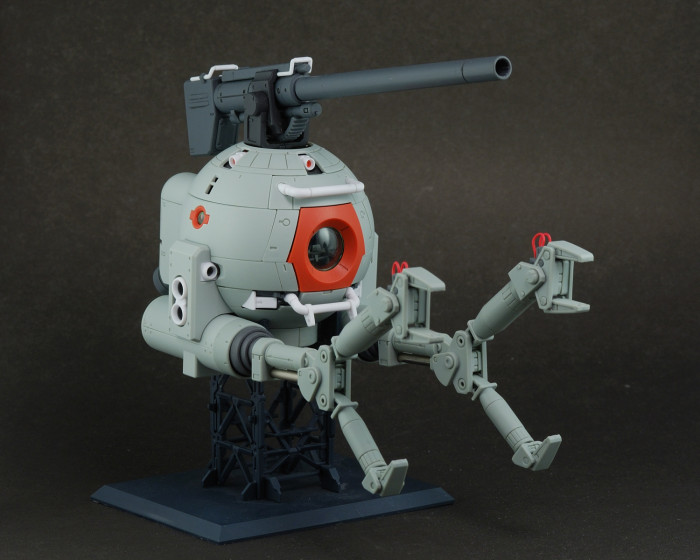
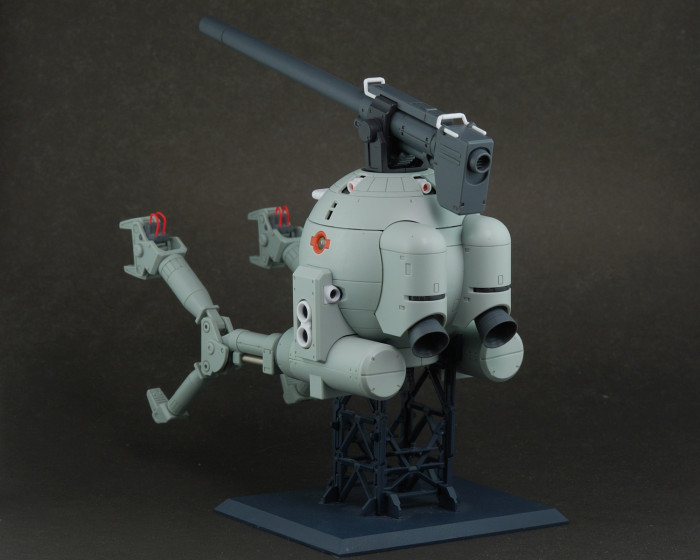
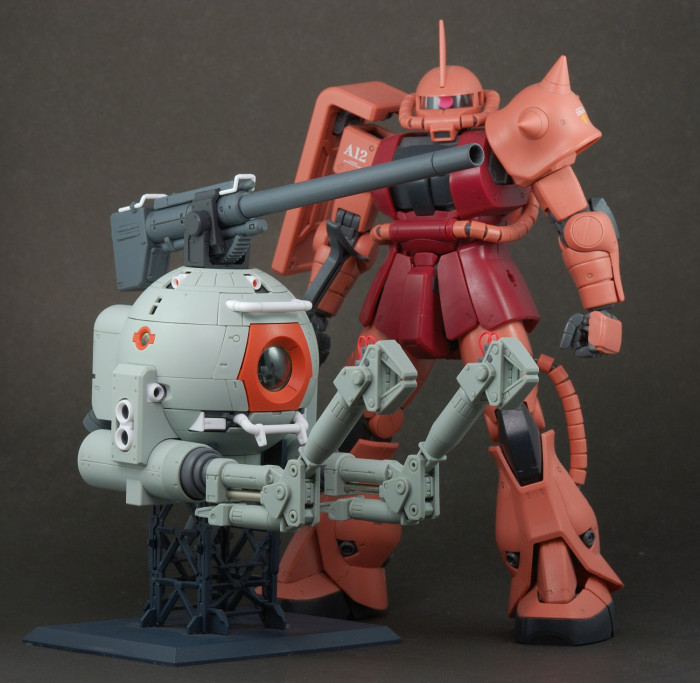
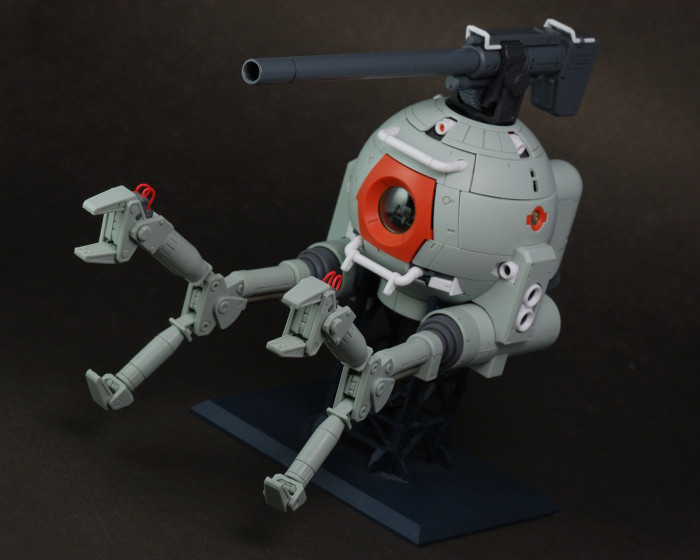
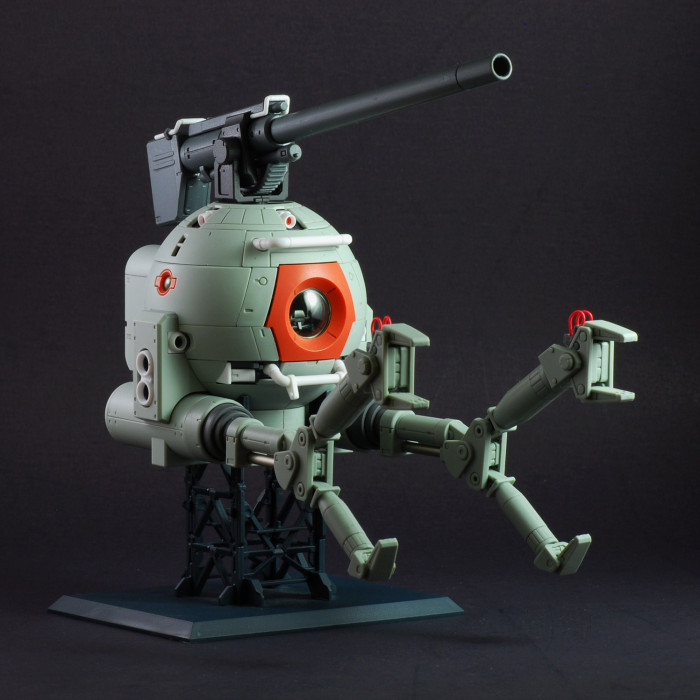
While the Ball looks rather goofy in the anime, this Katoki redesign of the machine looks robust by comparison. The first thing one would notice about this model is its size. The anime led me to believe that the Ball is pretty much a human-sized hamster ball in space, but the model suggests otherwise. Measuring 15cm (6 inches) in length and around 10cm in height (4 inches), the MG Ball may not measure up to other standard 1/100 scale kits, but definitely carries its own sense of mass and presence.
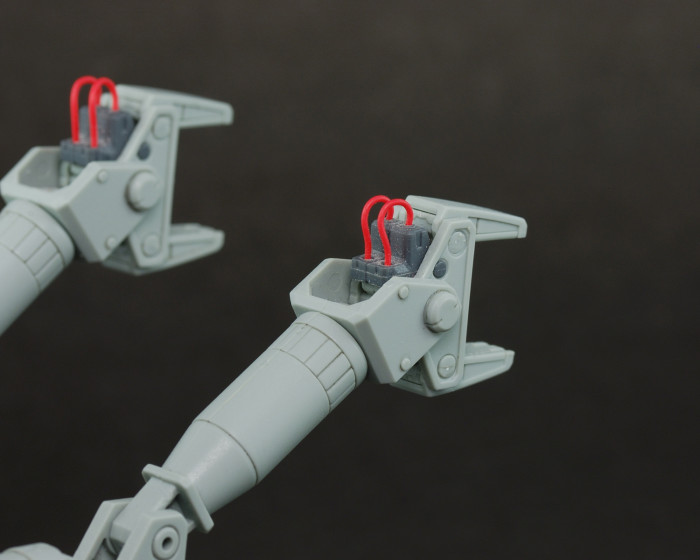
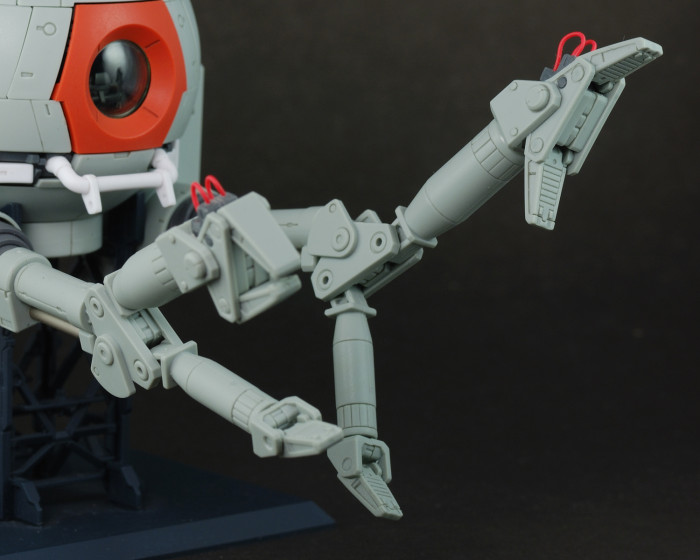
Whereas the original design has feeble and tiny looking arms, this kit features a set of slightly elongated manipulators with an extra appendage attached to each “elbow”, which are able to fold outward to create a larger set of “claws” in conjunction with the forearm. The 180mm recoilless cannon also looks considerably larger and more threatening than the original design. It’s almost the exact same length as the standard Zaku Bazooka included in the MG Zaku II 2.0 kits, but a little thinner.
All in all, this redesign of the Ball actually looks like it packs a punch, as opposed to the goofy-looking original design. According to the translation of the instruction manual introduction, Katoki actually designed the new Ball along the lines of a small-sized mobile armour, and judging by the model itself, he was definitely successful to this end.
Closer look
Of course, to re-invent the Ball, Katoki and the engineers and Bandai needed to tweak more than just the sizes and proportions of the machine. Here is where the details come in.
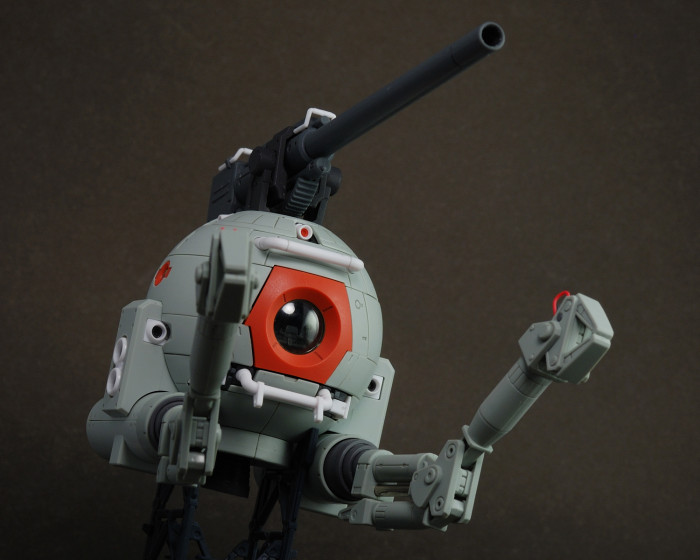
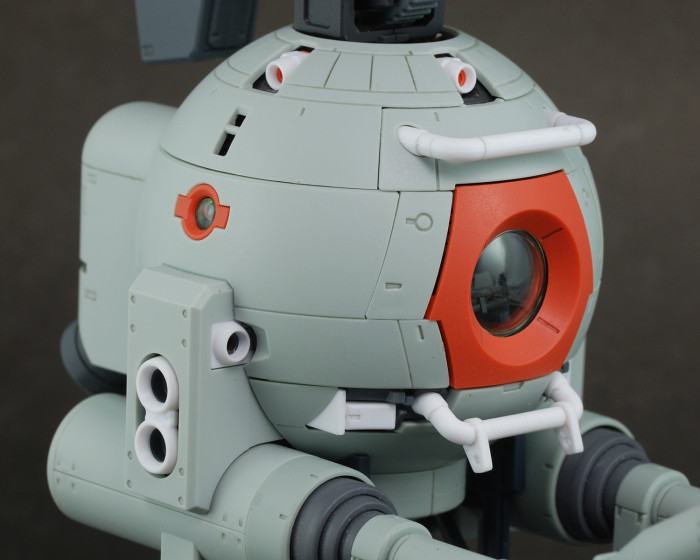
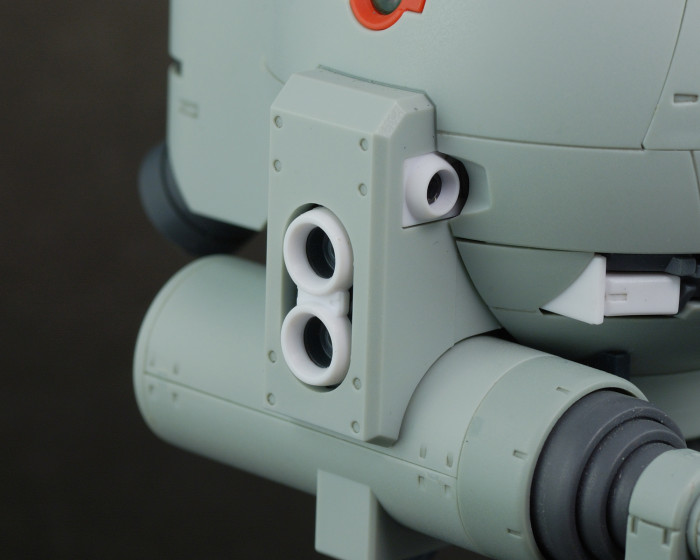
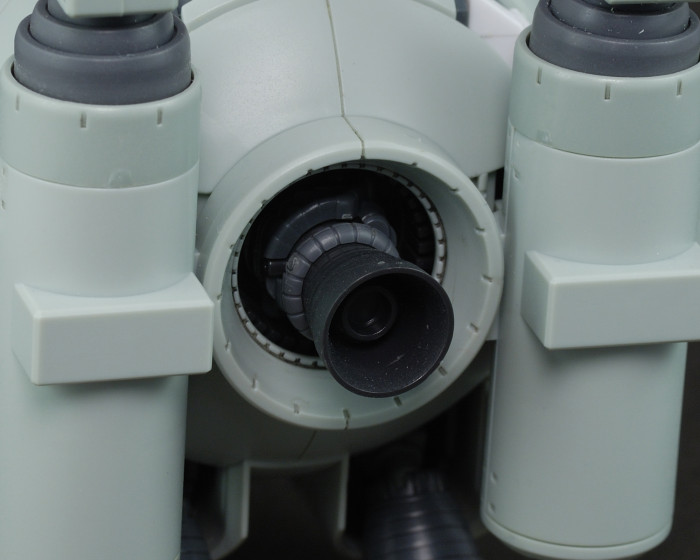
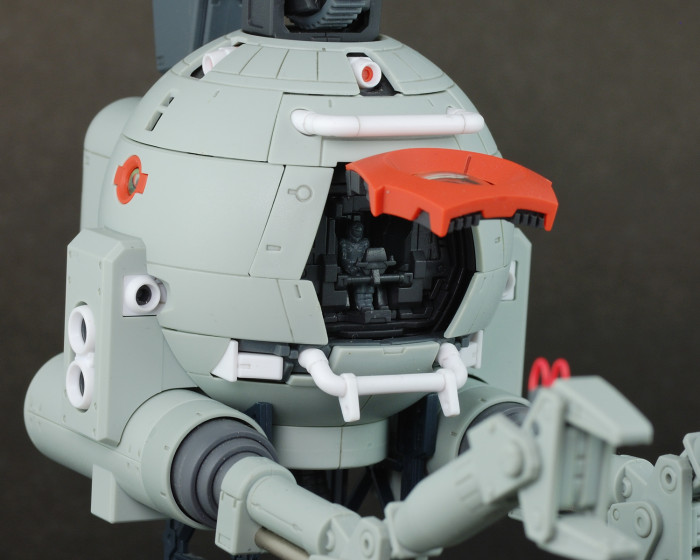
There are a number of mechanical details on the main body of the Ball worth mentioning. The arm mounts on either side are much more pronounced on the model. Two white bars are placed above and below the main window to the cockpit, which is moulded in clear green plastic.
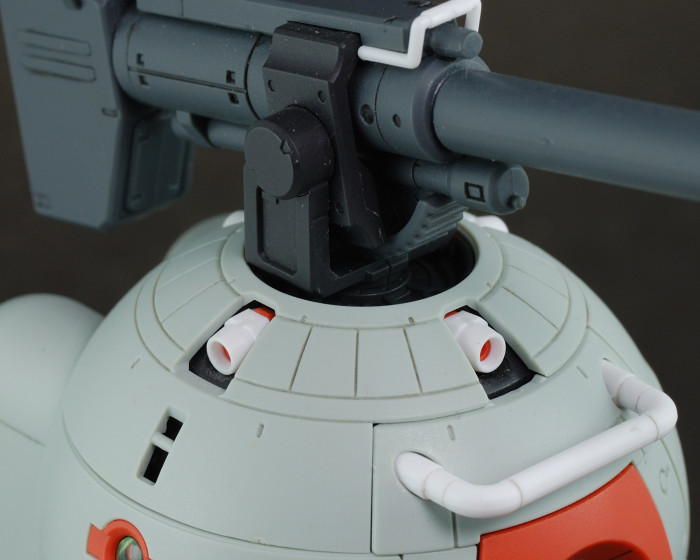
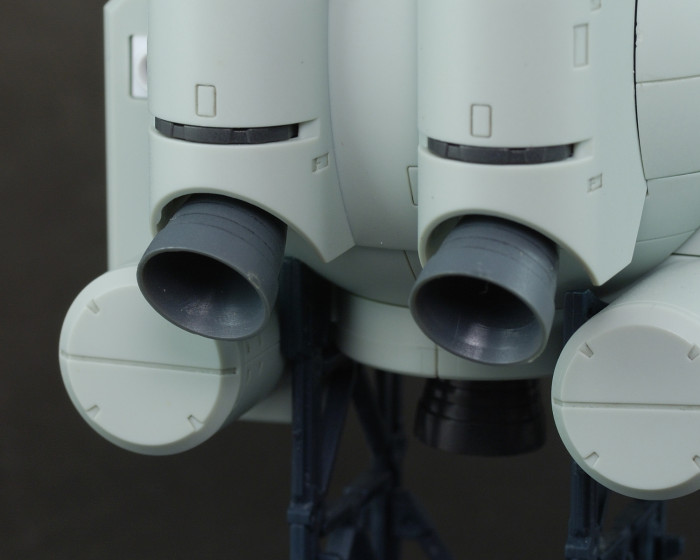
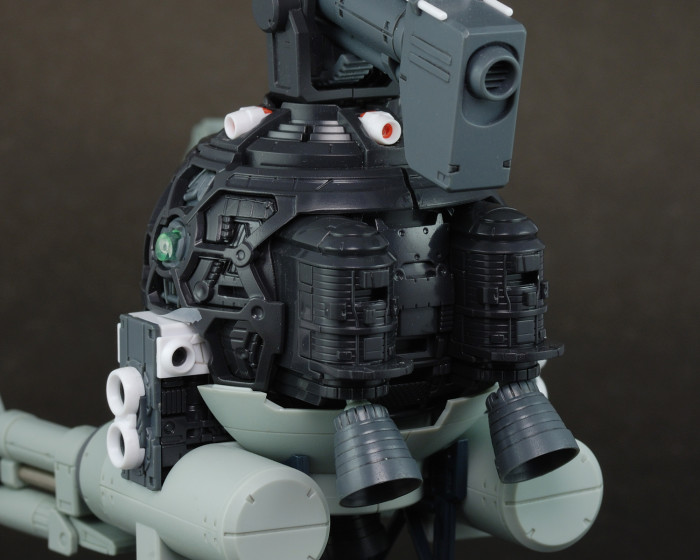
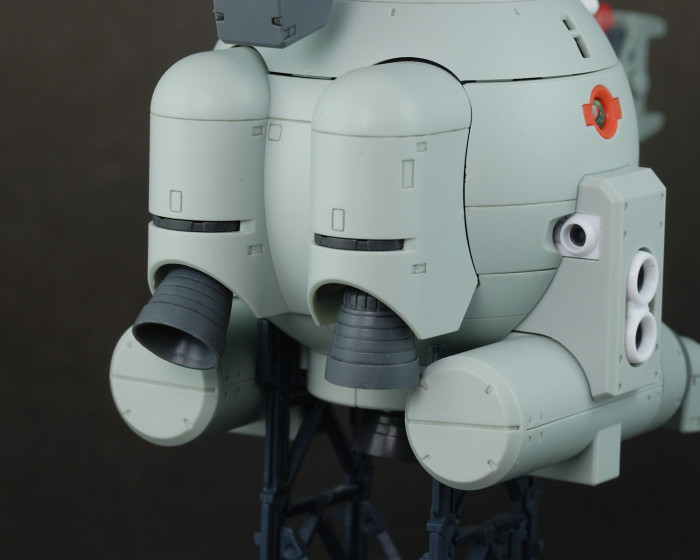
Furthermore, the array of thrusters and verniers are completely redesigned. There are for small verniers in a circular configuration on the top off the machine. The main back thrusters are significantly enlarged. A forward and backward vernier replaces the third thrusters on the sides arm mounts. And finally, the disk array of small vernier on the bottom is replaced by one large thruster. This significant amount of alterations to the original design really gives the Ball a more realistic feel. Just by looking at the model one is able to get a sense of how it would maneuver around in zero gravity, and that goes a long way in making the machine appear feasible in the real world. Hell, give me a few hard drinks and a whack to the head and I would totally believe you if you showed me a photoshoped picture of a Ball working on the international space station, I would totally believe you.
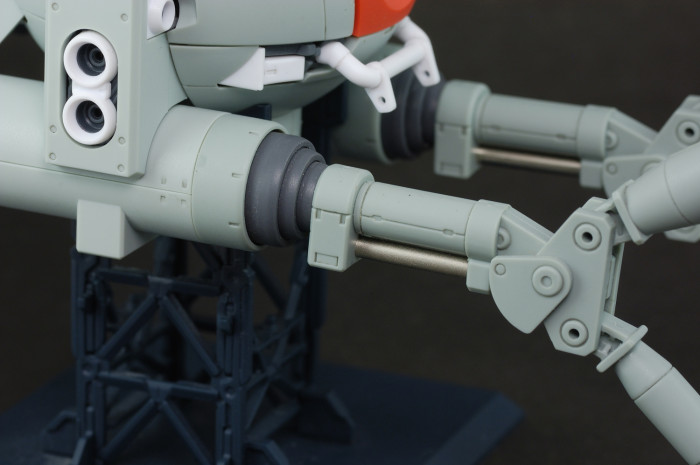
A host of improvements have also been applied to the manipulators. The first of which is the addition of small wires at the base of the “hands”. At the base of the manipulators you will find a piston made out of metal and a jacket over the joint main arm joints made out rubber. Like the main body itself, detailed panel lines run across the entire length of the manipulators, which, along with the aforementioned mechanical details, furthers the sense of realism in the model.
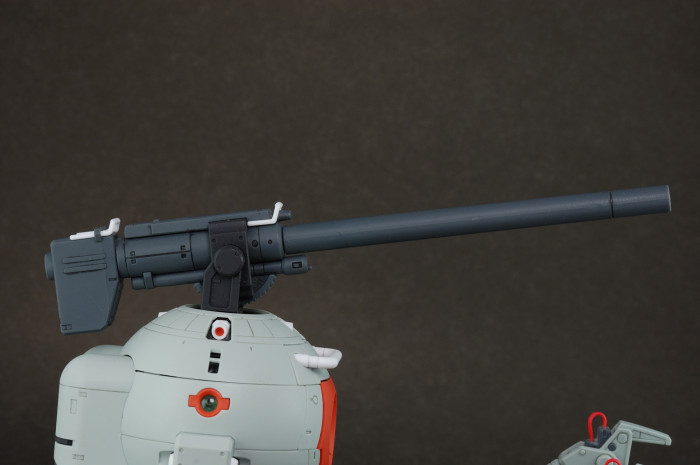
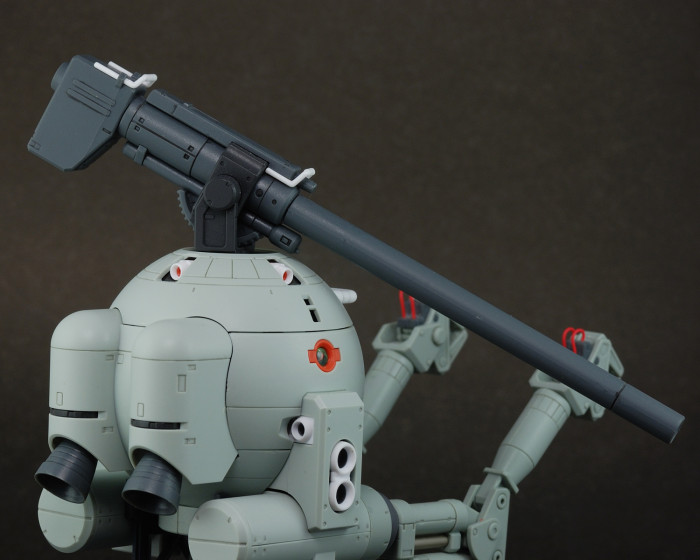
Finally, the 180mm recoilless gun mounted on the top of the Ball also gains improvements. It definitely feels bulkier at the base with a more complex mechanical design that soars over the original “pipe on a hinge” look. Another notable addition is the small white maintenance handles placed on the topside of the cannon, which accentuates the grey surfaces of the cannon and prevents the weapon from appearing too dull.
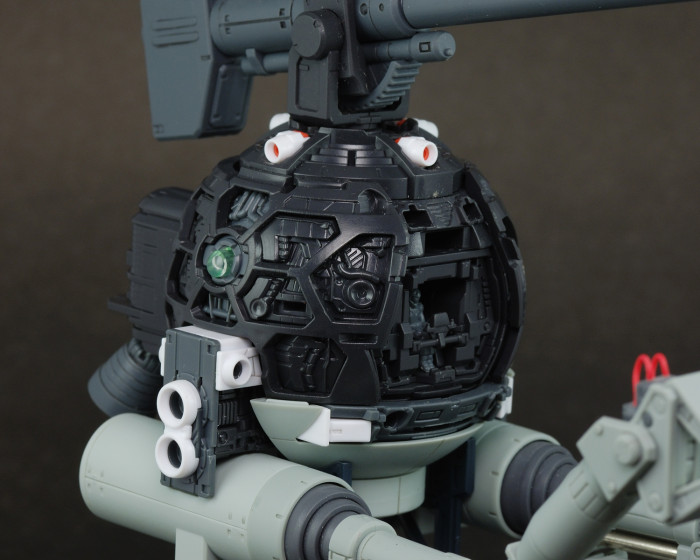
If you remove the external armour on the Ball, you will find an explosion of mechanical detail. Though virtually everything is moulded in black, the sheer amount of effort in recreating the interior of this fictional machine is nothing short of impressive. The interior core of the Ball is enclosed with reinforced structural frame. Pipes are visible through windows of the frame, and if you look into the cock pit, you’ll not only find the pilot sitting snugly in its place, but also the foot and screen panel controls placed in front of him. Needless to say, if you enjoy detailing the interior frames of Master Grade kits, the MG Ball is your dream come true.
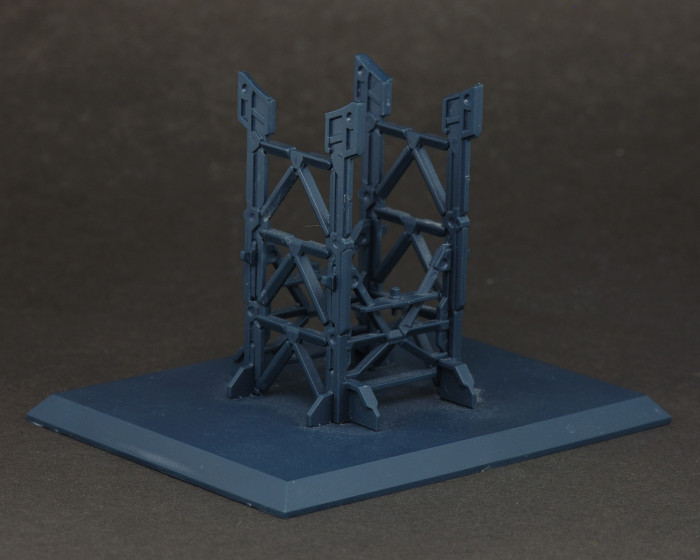
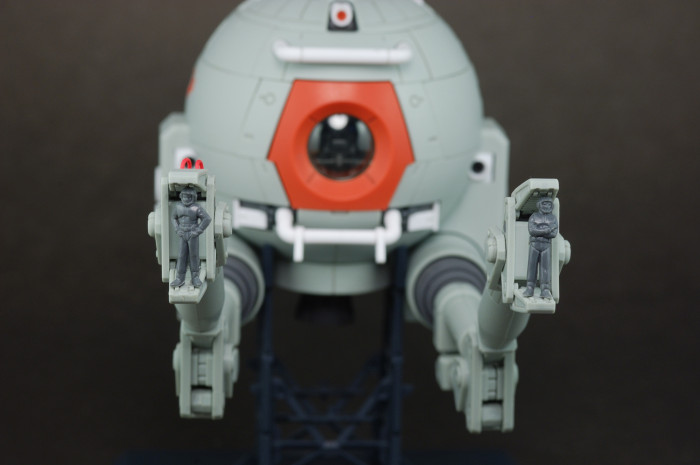
As the Ball lacks feet to stand with, a non-articulated rack-style display base is included. It’s a shame that the Ball was released before the action base came about, because the model does not accommodate support for it. Nevertheless, the display that comes with the model works cradles the model securely from underneath. While you won’t be able to pull off any dynamic angles with it, it looks handsomely enough. Two 1/100 scale members of the maintenance crew are also included. These tiny figures very effectively demonstrate the immense size of the ball.
Articulation
Being what it is, the MG Ball certainly does not have as many points of articulation as humanoid models. But in the points it does possess, the Ball executes them brilliantly.
The top verniers and bottom thruster found on the main body of the Ball move. The former is able to tilt upwards to around 25 degrees, and the latter is able to tilt slightly to the sides thanks to a polycap joint. The twin thrusters at the back are double jointed via a hinge joint and a ball joint. This means you can point the thrusters directly downwards or up to around 45 degrees backwards, as well as tilt them side to side slightly. The cockpit door opens via an outward sliding mechanism and a hinge on the top end of the door.
The base arm joint is a ball joint enclosed in a ruby jacket, and it allows the arms to twist and tilt slightly. The “elbow” and “wrist” joints of the manipulators are consists of three hinge joints: one attached to the main appendage, and the two others attached to each of the auxillery appendages/claws. This means that you are able to place the arms in any position you can think of.
The gun also works exactly the same way as you would expect. It tilts forward and backwards and swivels the full 360 degrees.
Final say
At the end of the day, I am strapped for criticism against the MG Ball ver. Ka. There really is nothing wrong with it. Everything works the way you would expect, if not better, and the impressive outward and interior mechanical details are hard to match even among present-day Master Grade models. And to top it off, the MG Ball retails for only 2000 yen! Even by my often anal-retentive standards, the Ball is virtually perfect. Because of this, I’ll have to go out of my usual way to raise a point of valid criticism against the model, and that is its dry-transfer decals.
Those of you who have worked with dry-transfers would know how stiff the clear plastic backing is. Now imagine wrapping that around the round surfaces of the Ball’s hull armour. To my clumsy hands, the task was an absolute nightmare. During my disorganized fumbling with the plastic tape and the decals, I managed to screw up BOTH of the major markings on the model consecutively. At that point, I threw down the decals, grabbed my file, and grinded away the sorry remains of the failed decals and called it a day. Maybe I’m just awful with my hands, but I would recommend the waterslide decals (sold separately) if you want the various markings on the model. This is my one and only gripe against the MG Ball.
Of course, this lone criticism against the model does not change my overwhelmingly positive feeling for the MG Ball itself. To me, it’s a really interesting break for Gunpla in general. Because of its unconventional and realistic design, I believe the MG Ball would not only appeal to fans of gunpla, but to any fan of Science Fiction in general. Whether you love the look of the ill-fated underdog from the One Year War, or you want to dip your feet into the world of plamo, or you just want a fun build to pass the time, the MG Ball is unmistakably an excellent choice.
Pros
-
Superb re-design of a classic machine
-
Brilliant external and internal details
-
Larger than you would think
-
Attractive price of 2000 yen
Cons
-
Dry transfer decals on round surfaces are an immense pain

5 replies on “Review: MG Ball (Ver. Ka)”
Loved the review! Very thorough and worthy of reading! I have this kit as well as the ’30th anniversary’ version with the clear outer shell parts! Its shows off the internal structure of this MG kit really well! I am definitely a fan of ‘underdog’ mechs and this Ball is way up there in my favourites list.
Thanks Oliver! Yeah, I’d reckon the MG bull is one of the kits that benefit the most from those clear parts, since the internal structure is not at all compromised by the need to accommodate articulation into the design. Had I known of the 30th anniversary compaign beforehand, I definitely would’ve waited.
Did you give it a matte finish?looks so
Yep, just a quick-over with some matte top coat.
I’m a complete noob, but sometimes I really believe these models look better without panel lining.