Ah, the RX-78-2 Gundam, the progenitor of the sprawling mass that is the Gundam franchise. Like it or not, the parade colour scheme of the main character’s mobile suit in virtually every single entry into the Gundam franchise traces back to it. While the original design is certainly not very fancy (especially by today’s standards), its lofty status in the hearts of fans has kept it popular through the decades. Of course, with popularly comes merchandise, and the original Gundam has certainly seen its share of it. After 30 years of gunpla, there are RX-78-2 kits in every grade and every size. Even if you don’t want the trouble of building it yourself, the original Gundam can be found in each and every gundam action figure line Bandai has worked on.
“How do they do it? How are they able to keep selling the same design over and over again,” you may ask. Asides from the fanaticism of the fans, I must credit Bandai with its continued dedication to innovate and improve upon their trusty workhorse, and the culmination of these efforts is the subject of this review – the Real Grade RX-78-2 Gundam. Armed with the tagline “Excitement Embodied”, this new grade makes a bold promise to gunpla fans – and boy does it deliver. Not only does it look great, but it is an absolute joy to build as well.
Inner Frame
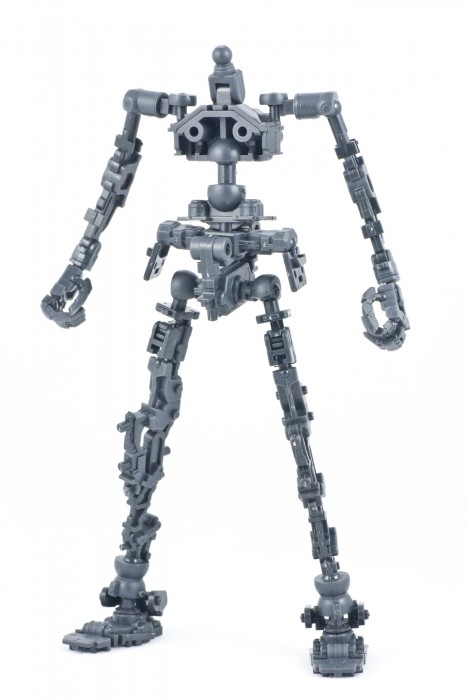
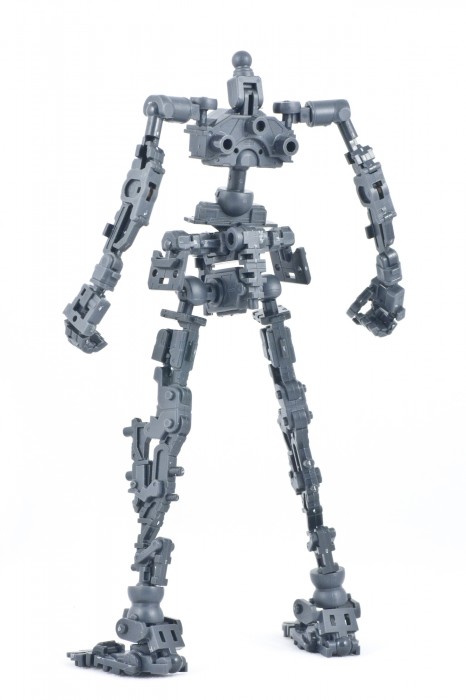
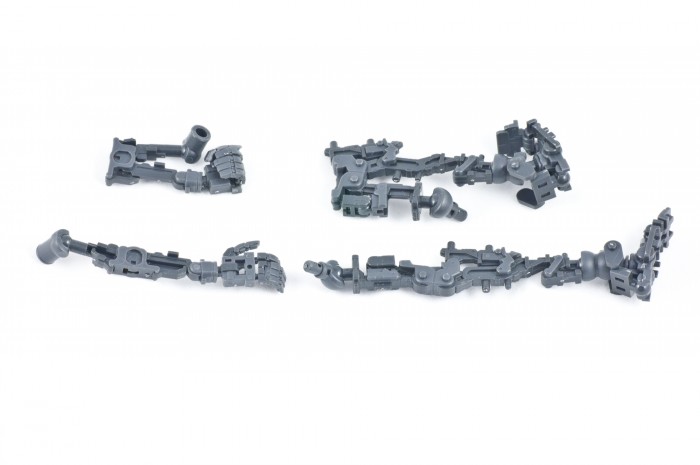
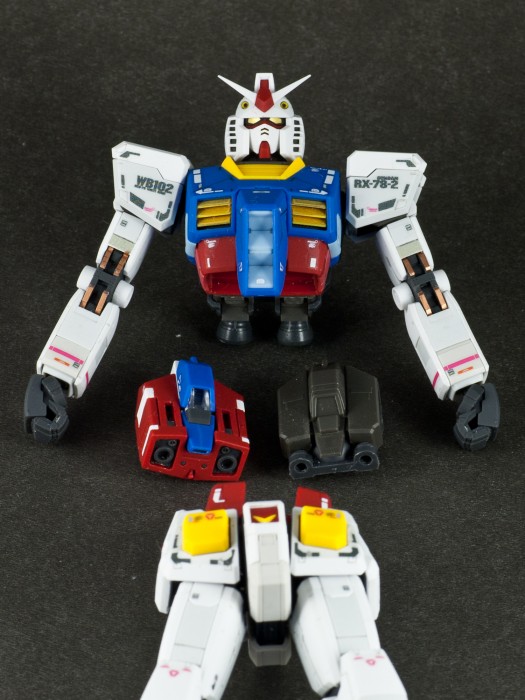
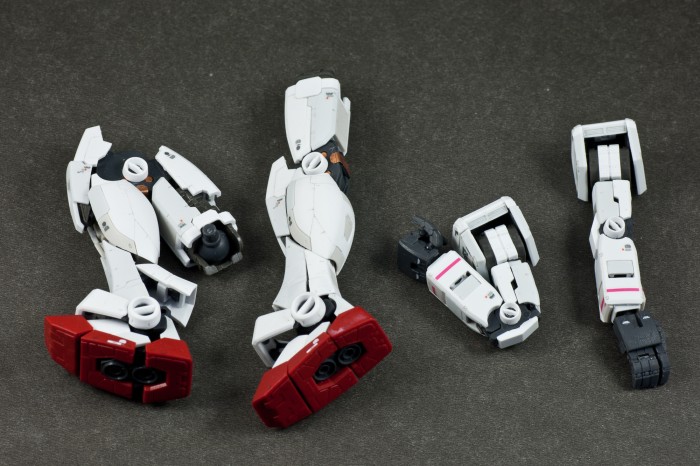
When I first held the RG Gundam’s inner frame runner, I was very, very confused – after all, there were only 13 components on the whole thing. I knew the kit is supposed to be highly articulated, but I didn’t have the slightest clue as how that would work. But as I freed the pieces from the tree, it dawned to me.
Everything moves.
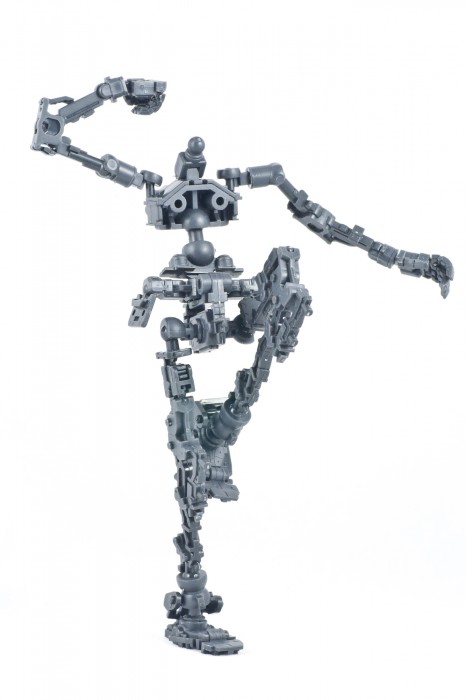
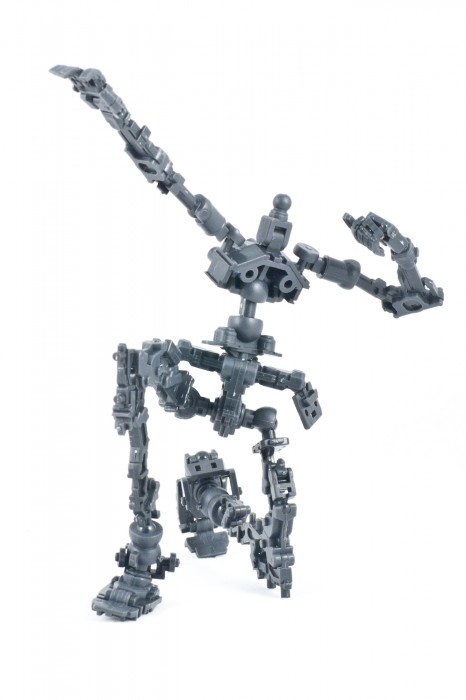
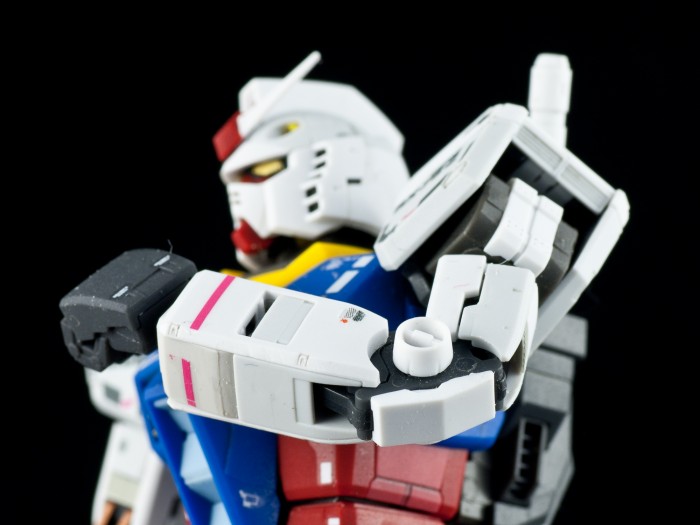
I’m not talking about the basic elbow and knee joints. I’m talking linked movements in the arms and legs, double-jointed thumbs and waist, articulated toes and neck, multi-axis shoulders – the whole shebang. I was so lost in my own amazement that I felt like a gunpla virgin all over again. Somehow, the wizards at Bandai managed to reduce the complexities of a full-fledged Master Grade inner frame into a single runner of a mere 13 components while compromising virtually nothing. It blew my mind.
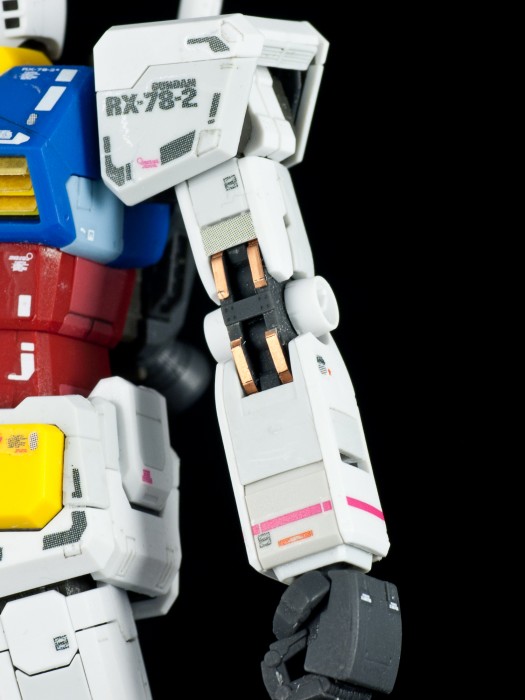
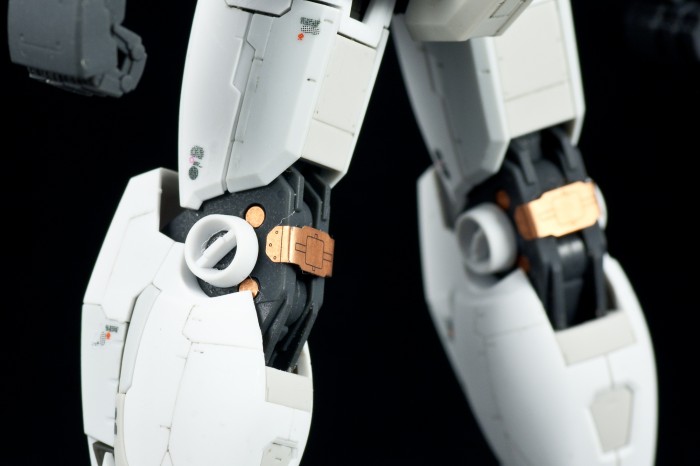
The inner frame pieces are made from a hard rubbery material similar to the polycaps of some kits. The joints come pre-assembled – all one has to do is to cut the component from the runner and snap/twist the pieces into the right positions. The process of bending the joints for the first time may feel a little scary at first given the tightness of the parts, but all the joints budged smoothly after a moderate amount of pressure, very much like the elbows Evangelion plamo kits. Unlike the Evangelion elbow joints, however, the articulation on these Real Grade joints is not gimped. Both the knees and elbows bend the full 180 degrees, which makes the Real Grade RX-78-2 on par with even the best of the Master Grade kits.
The Real Grade inner frame is something you simply have to experience for yourself, simply because it’s by far the most exciting thing to happen in the plamo world in recent history. Whether it’s this kit or future RG kits, you gotta try it out if only for the nifty inner frames. Anything else would be self-deprivation.
Finished product
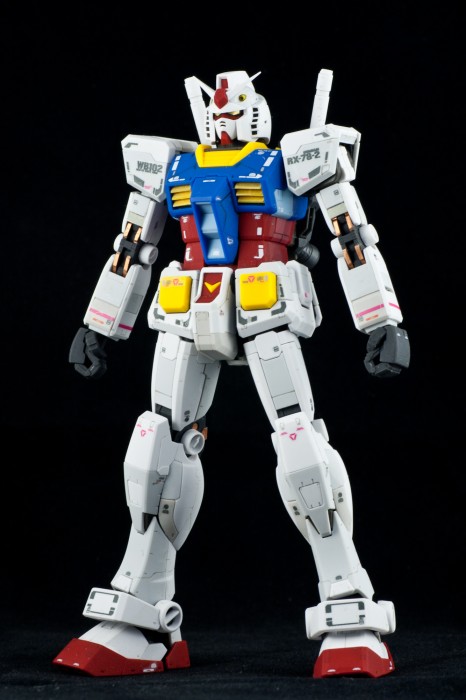
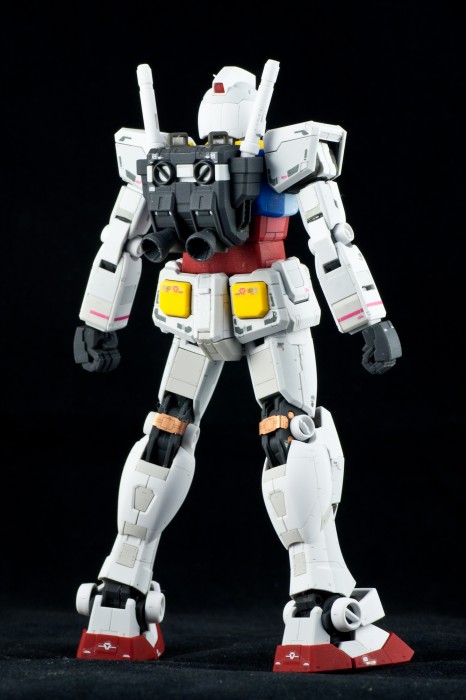
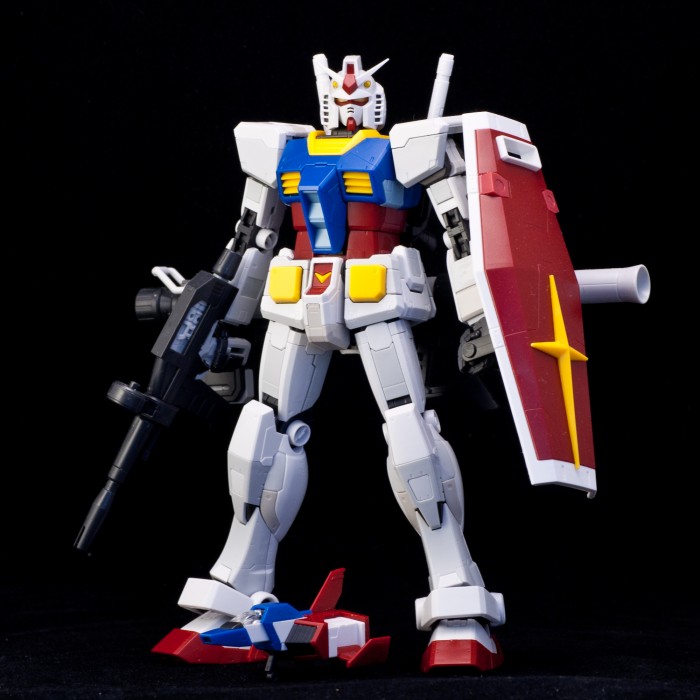
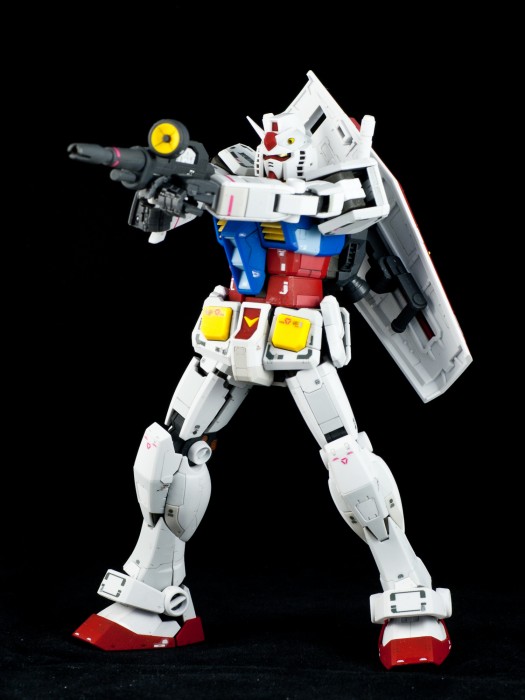
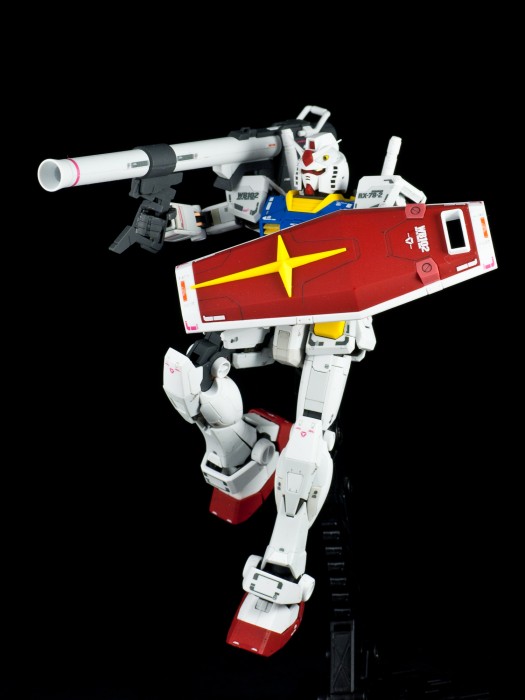
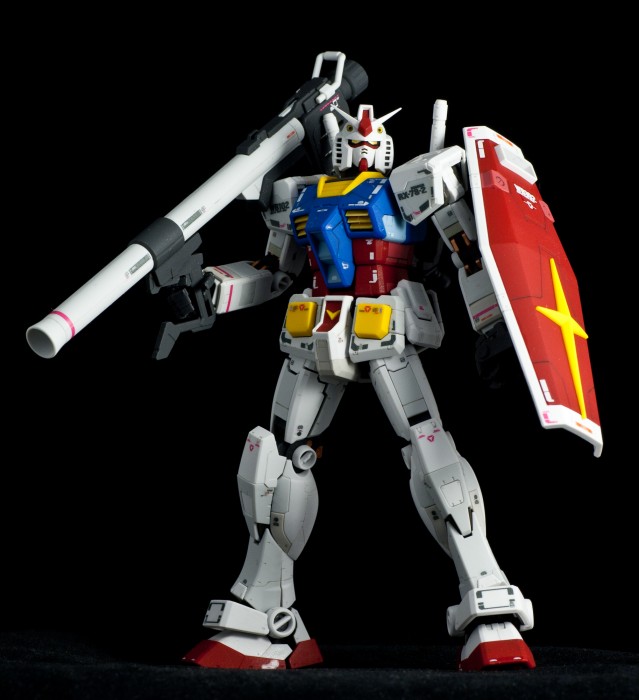
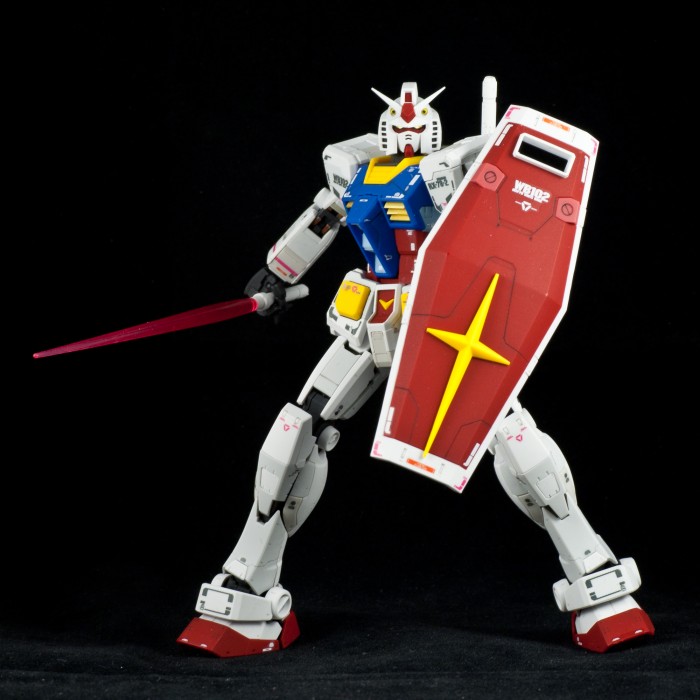
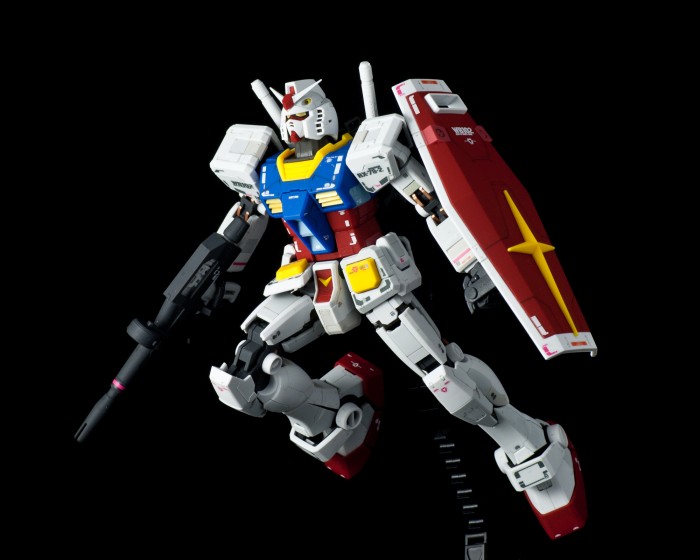
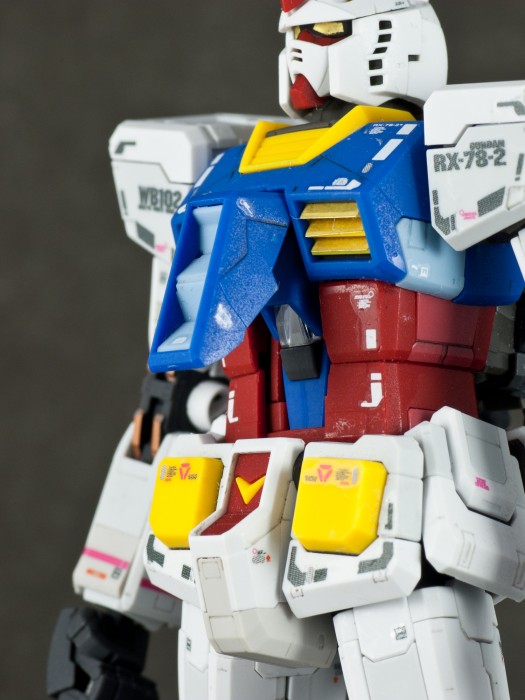
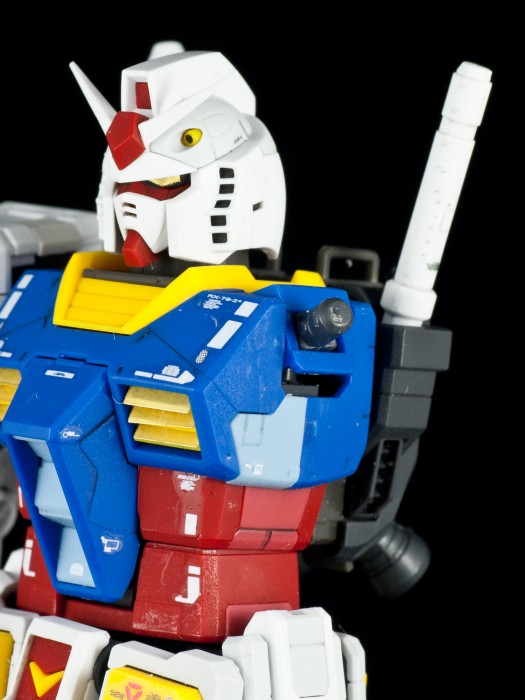
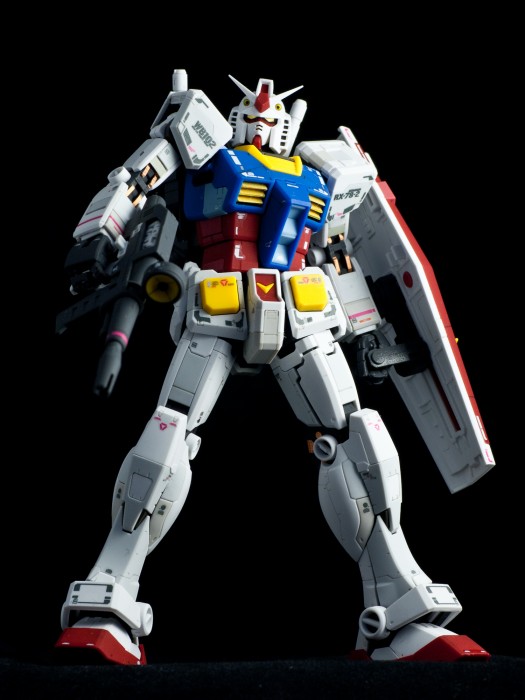
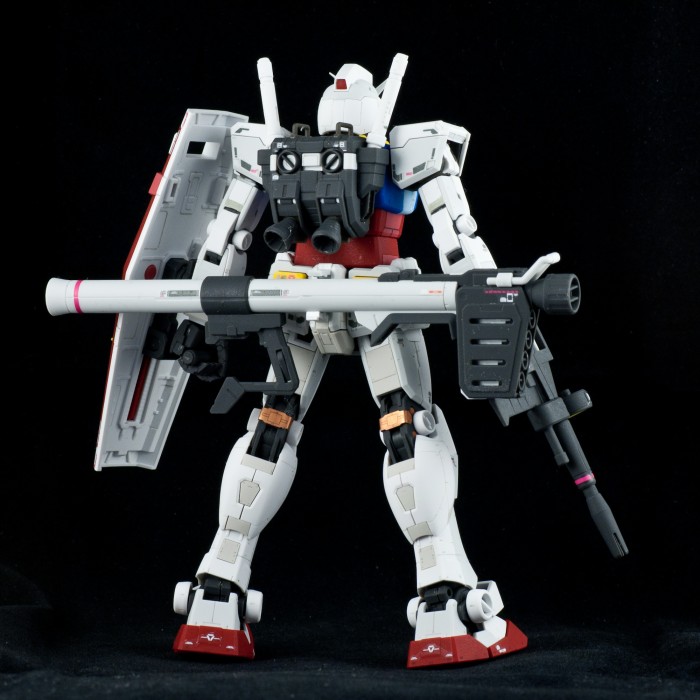
The original Gundam has come a long way since its blocky roots in the late 70s. This new incarnation is based on the much publicized 1:1 scale Gundam erected in Shiokaze Park (now re-located to Shizuoka). The surfaces on the armour are littered with panel lines and part divisions, giving it more realistic look – well, as realistic as the notion of a giant bipedal war machine can get!
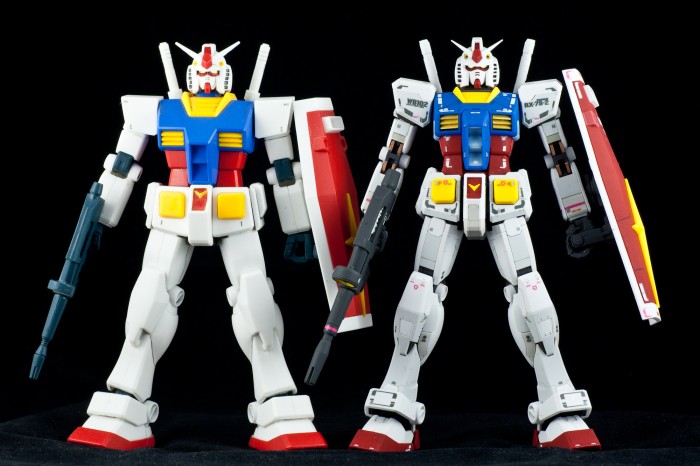
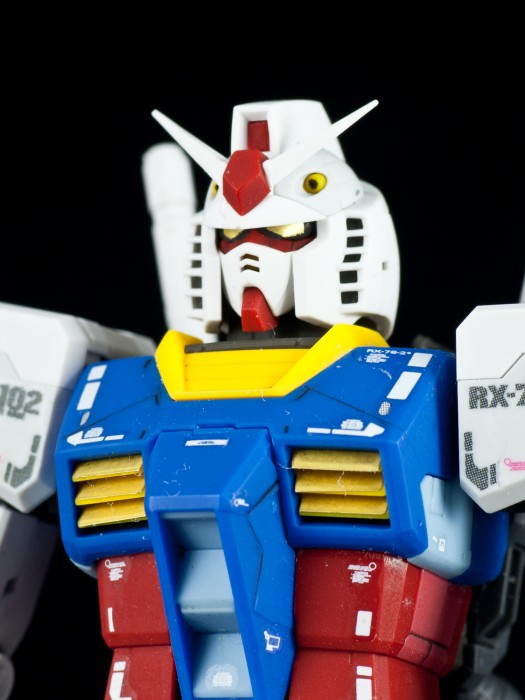
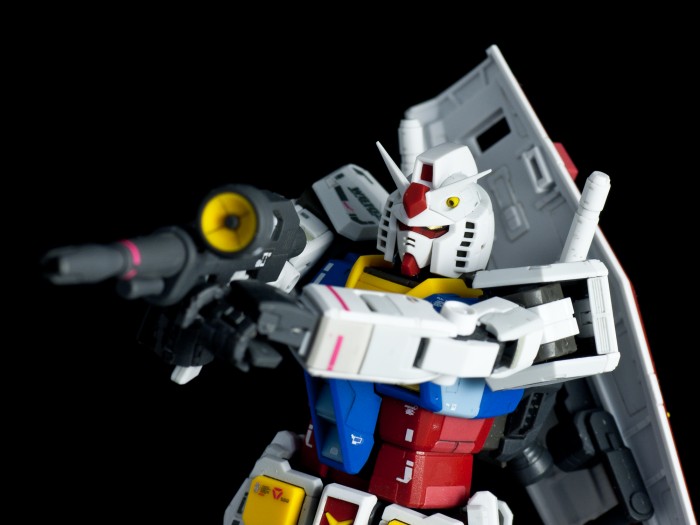
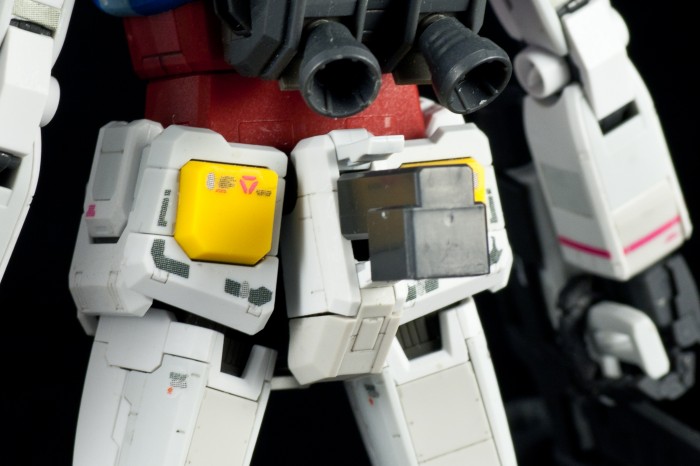
When placed next to the HGUC RX-78-2 Gundam, it is immediately apparent that the RG version shits all over its predecessor. Each of the main colours (red, blue and white) of the original design has been separated into two distinct tones each. This gives some much-needed depth to the appearance of the suit. The amount colour separation in this kit is nothing short of absurd. In short, save for the eyes, the kit is 100% colour-accurate right out of the box. Even the tiny yellow vulcans on its head comes as a separate yellow-injected part. Like the MG RX-78-2 Gundam Ver. 2.0, the face vents for this Real Grade Gundam are also moulded into the plastic. If Bandai’s aim is to show off their plastic-injection technologies, then they’ve definitely accomplished their goal, because this stuff is nothing short of amazing.
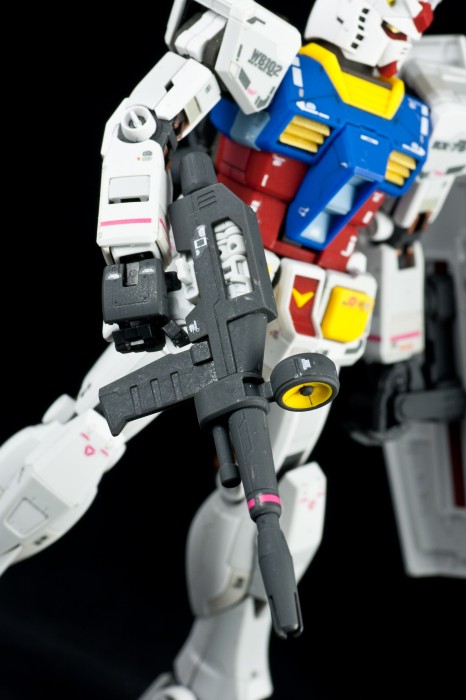
The model comes with a full set of clear sticker decals. These are thinner than the usual clear stickers that one receives in MG kits. Some of the markings also contain reflective foil – something that’s I’ve never seen from clear stickers before. For my build, I chose to mainly use waterslide decals (which are sold separately). I’ve only used the stickers for the eyes, chest vents, knee joints and the elbow joints. The stickers were not as adhesive as I had hoped, but a touch of superglue was sufficient tame the stickers that had to be folded over edges. It’s important to note the waterslide decals do not carry the same foil effect, so some of the foil details on the stickers I’ve omitted are not shown here. If you are curious about those, refer to the promotional images of the kit.
By the way, if you plan to use waterslide decals on this kit, I highly recommend purchasing two sets unless you are very confident in your skills. Many of the decals are downright miniscule, so it doesn’t take much for mishaps to occur. They may tear during adjustment, or downright vanish when you drop them by accident. So unless you don’t have any qualms with waiting for a replacement set of decals to ship, I recommend saving yourself the trouble and pre-emptively ordering a second set.
Accessories
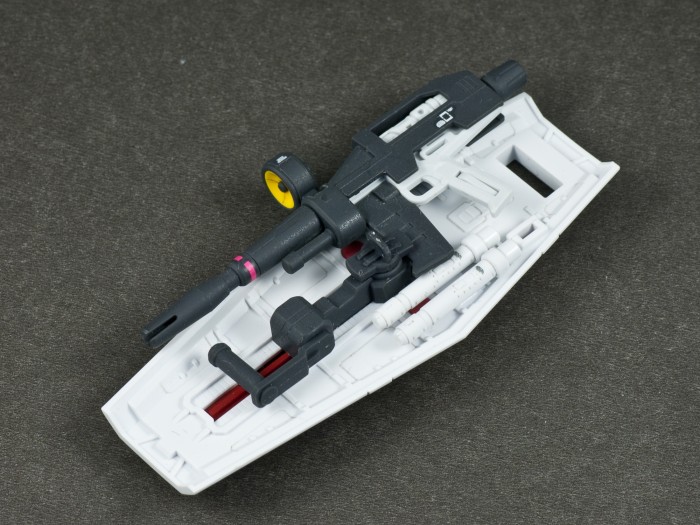
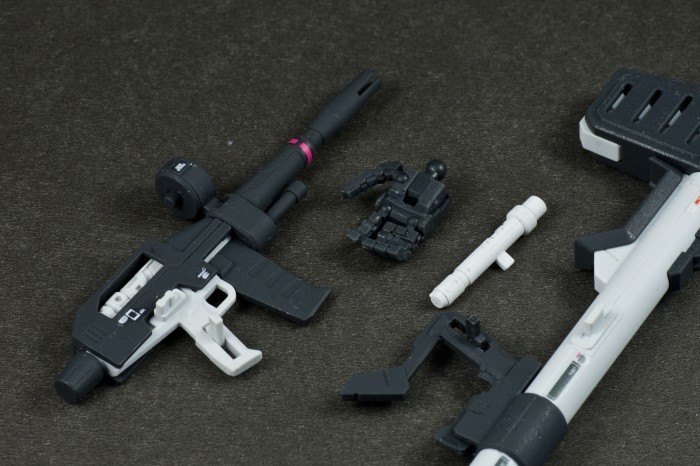
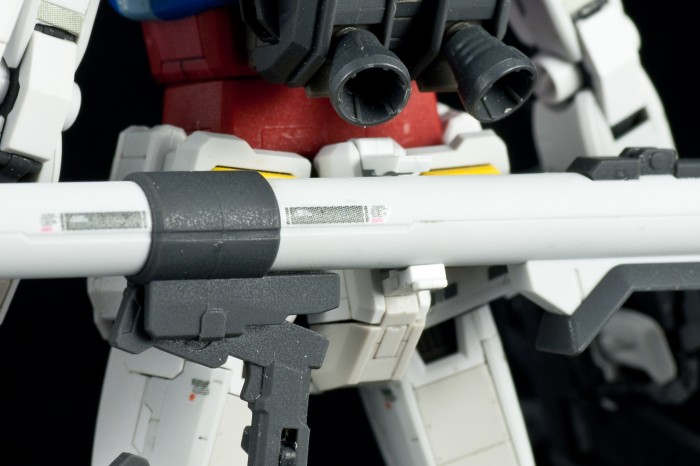
The beam rifle comes with all the details you’d expect – and then some. The targeting radar comes with a separately moulded yellow part, and it can swing to either direction by 45 degrees. The frontal grip of the rifle can be turned to either side. And to spice up the look of the beam rifle, the designers of the kit chose to add a dash of whit to the back half of the weapon.
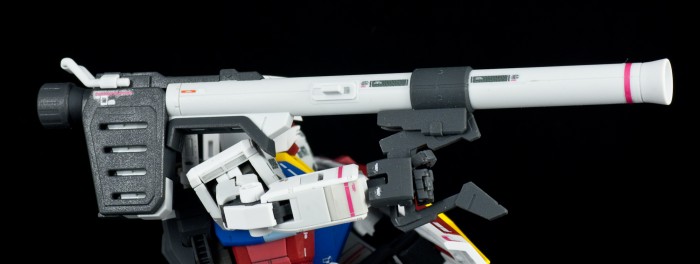
The hyper bazooka follows the same white and gray colour scheme adopted by the MG 2.0 version of the same suit and features an adjustable grip.
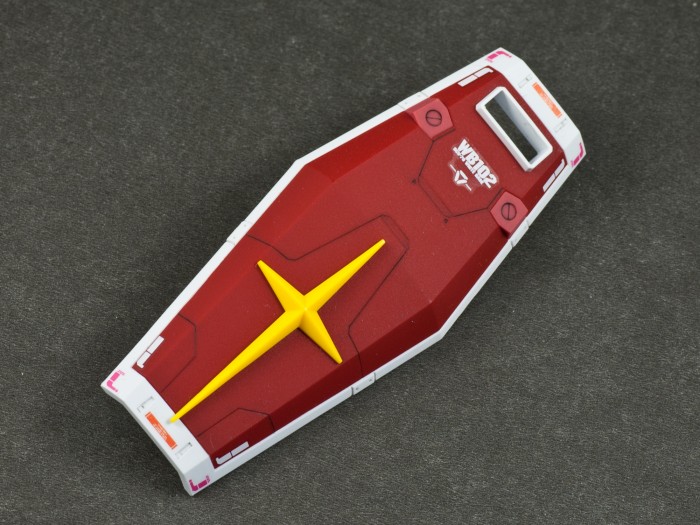
The shield is mounted onto the arm via a stubby tab, which is connected to the shield mount through a ball joint. The mount can be adjusted vertically, and the grip is also articulated. There is also a pair of tabs and indentations on the shield to mount beam sabers and beam rifle, respectively. The hyper bazooka cannot be mounted on the shield.
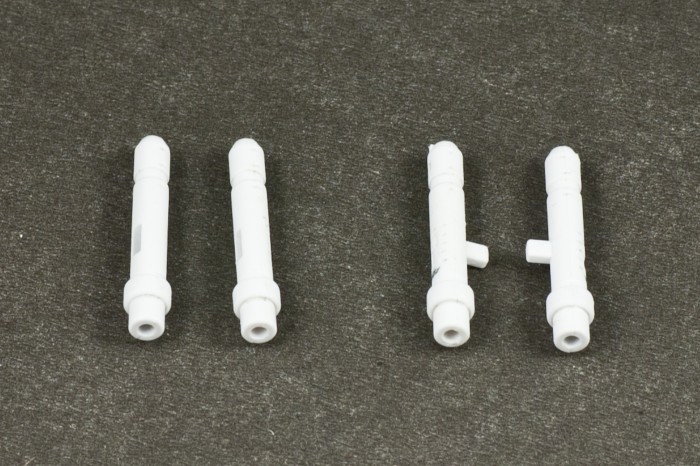
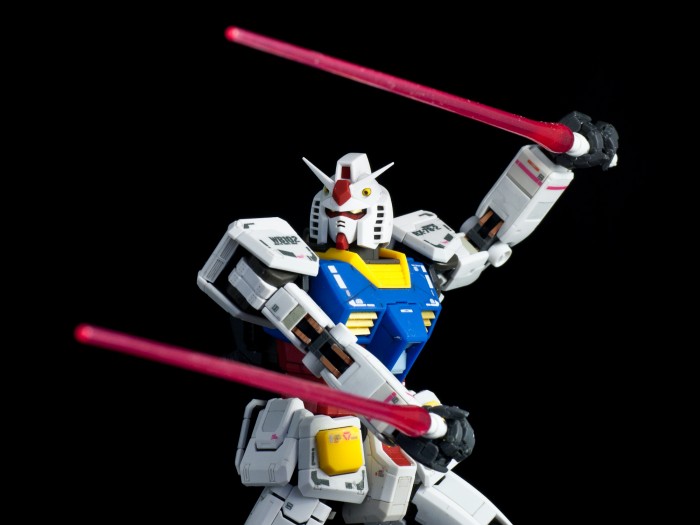
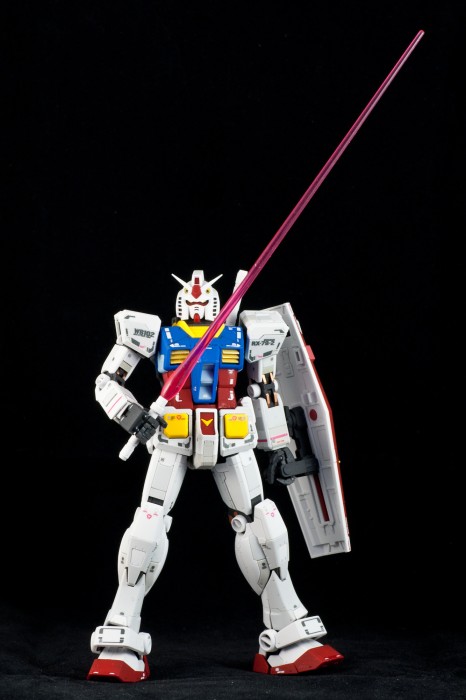
For melee weapons, the RG Gundam has its signature beam sabers. The hilts are moulded with great detail, and the kit even comes with a decal marking for each! The kit actually comes with 4 hilts: two with tabs protruding from their sides (which I will explain in a second), and two without tabs designed to be mounted onto the backpack or the shield.
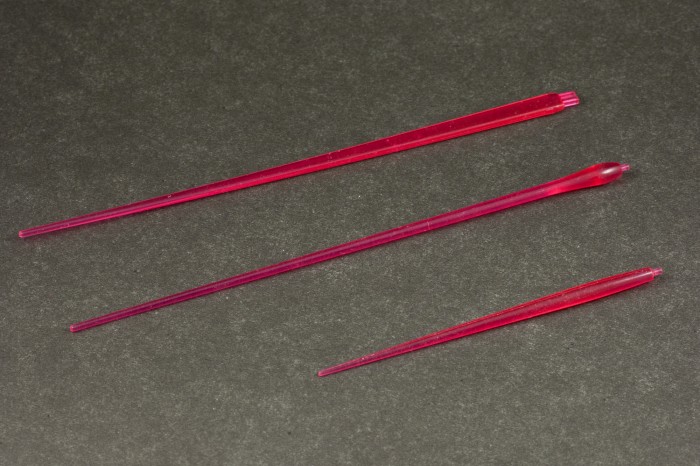
The problem with the beam sabers is their blades – they are too damn long. Each blade is 13.5cm long, which is approximately the same as the suit’s height. I was faced with considerable difficulty when I was trying to take photos of the RG Gundam brandishing the beam sabers because they are just unwieldy. The photo above offers a comparison between the beam saber blade of the MG Gundam Exia (top), the blade of the RG Gundam (middle), and the blade of the HG RX-78-2 (bottom). When the blade of a 1/144 scale kit is just as long as that of a 1/100 scale kit, is it any wonder that it looks out of place?
Thankfully, it is possible to mount the blade of the HGUC RX-78-2 onto the hilts of the RG version. It’s not a perfect fit, as the blade has a tendency to go a little crooked, but it sure as hell beats the default option.
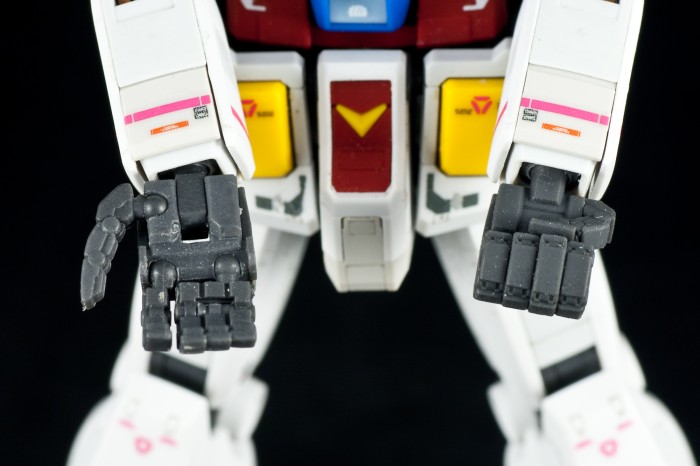
The kit comes with two pairs of hands: a pair of closed fists and an articulated pair. For the latter, the middle, ring and pinky fingers are moulded into a single solid piece with one ball joint connecting it to the palm of the hand. The thumb and index finger each come with a joint in the middle. These hands are preassembled on the trees, just like the hands of the PG Strike gundam, so there’s no need to snap together its tiny digits.
All of the weapons are mounted to the Gundam’s hands via small tabs. On the beam rifle and hyper bazooka, the tabs are unfolded from the handles, and the tabs on the beam sabers are moulded into the piece itself. While fiddling with the kit’s tiny fingers is somewhat of a challenge, once you overcome it, the tabs work very well in practice.
The Gundam’s butt can also open to either mount the hyper bazooka or accept the action base mount. Sadly, it does not do a very good job on the latter, as the grip on the piece is virtually non-existent. I’m not sure if this is a production error or what, but using the action base for this kit is not an option for my model. The couple of shots I did manage were a product of much trial and error, in which I had to rely on favourable physics to get the results I wanted. If every kit suffers from the same flaw as mine, then I would strongly advise against displaying the model on the action base, especially if on an elevated position.
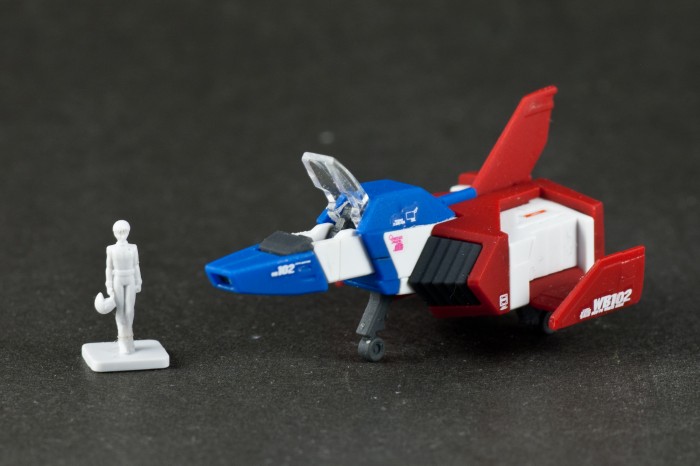
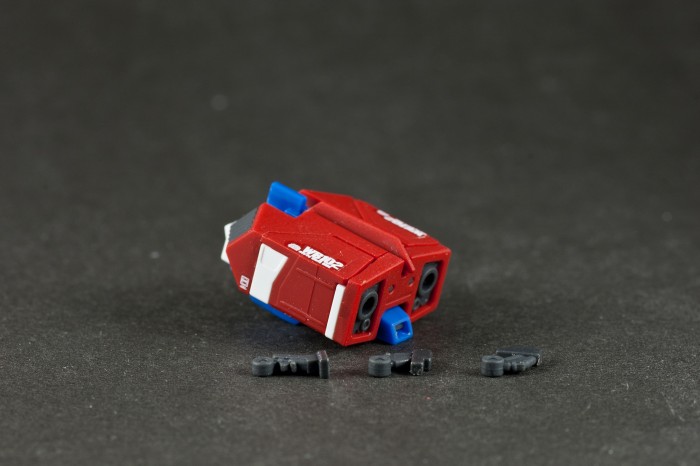
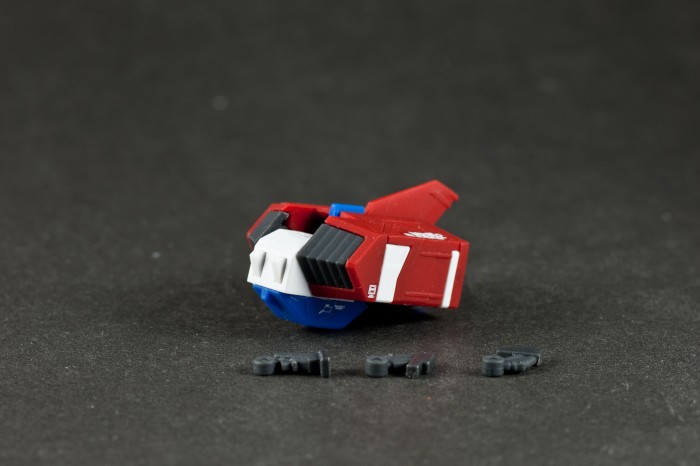
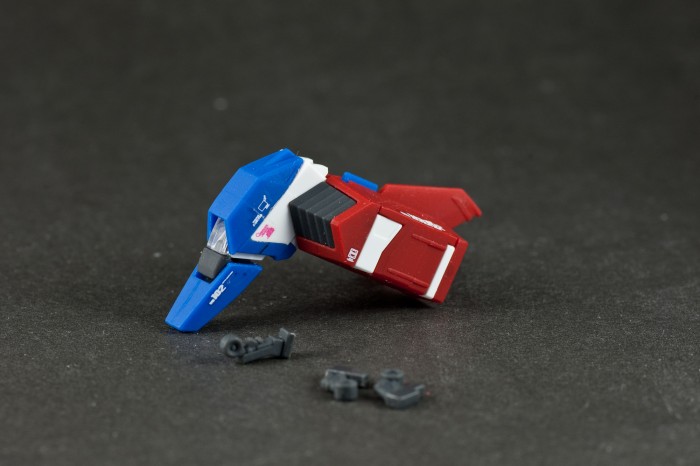
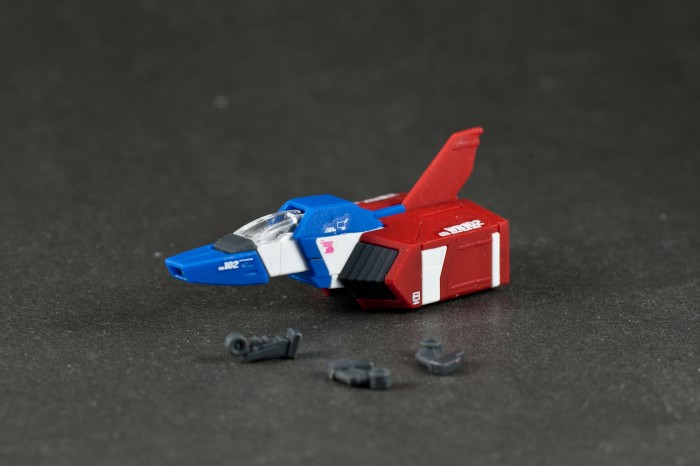
The core fighter is fully transformable and colour-accurate. While it lacks the hidden missile bays and the shifting cockpit of the MG 2.0 version, the core fighter for this RG kit is still very impressive, given its miniscule size (it’s only 4cm long!). The canopy can be opened, and a three-piece landing gear can be attached to its underbelly. Also included is a miniscule 1/144 scale Amuro Ray in his pilot suit, which is surprisingly detailed right down to his helmet.
To incorporate the transformed core fighter into the suit itself, simply swap out the gray torso block that houses the main torso joint.
Articulation
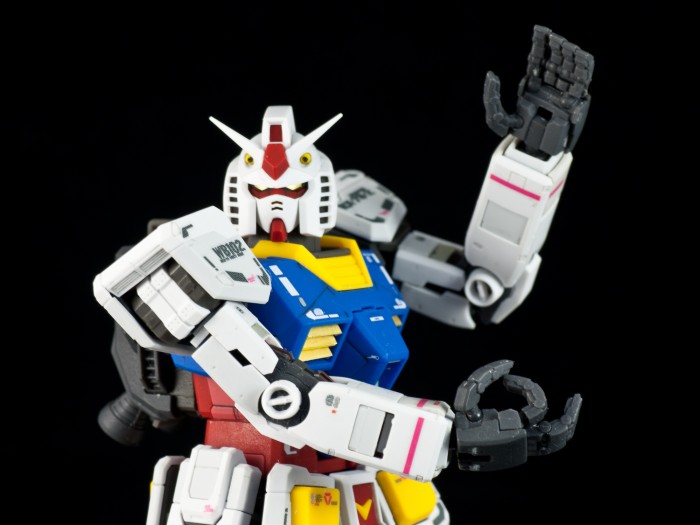
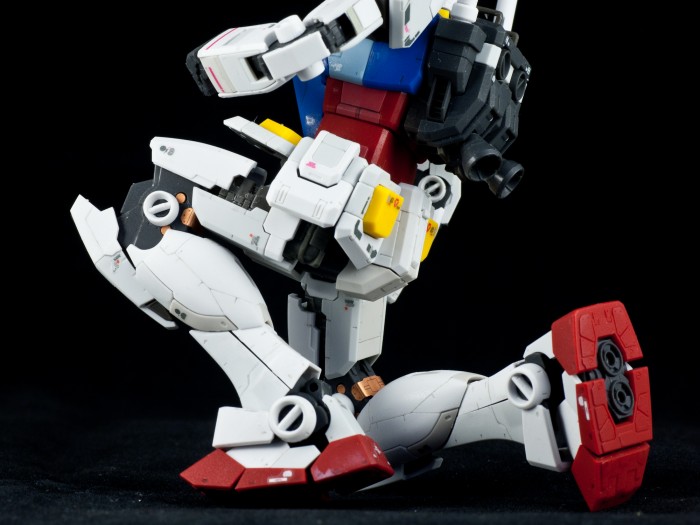
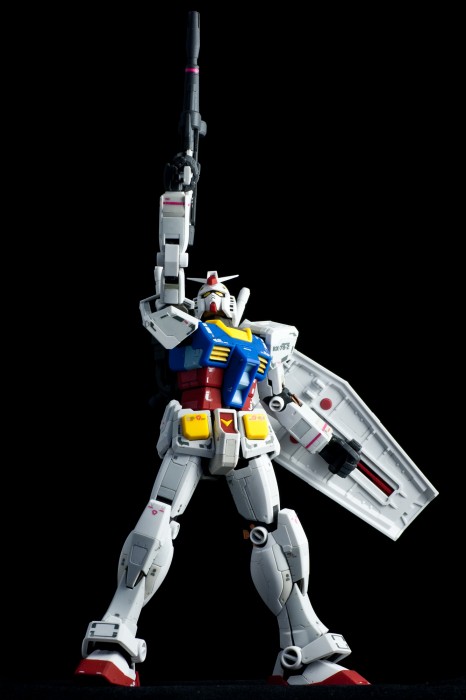
I can speak volumes on the articulation, but I’ll let the pictures do the talking. Some especially exceptional elements include double jointed thumbs and index fingers, three-stage foot assembly, and joints hidden in the backpack which allow you to adjust the angle of the beam sabers when they are stored on it. For all intents and purposes, the articulation on the RG Gundam is equivalent to modern Master Grade kits. The only aspect I was underwhelmed by was the shoulders, as they do not swing out like the MG 2.0 version, so they can’t swing forward with any great extent. This is kind of a bummer, but only in the context of the kit’s generally excellent articulation.
Sadly, the combination of extensive articulation and small sizes does make for some annoyances. Each plate on the Gundam’s skirt armour secured via a shallow ball joint, and it has the habit of popping out frequently. The same problem applies to the fingers, as the task of mounting the beam rifle is as tricky as threading a needle. I suppose for a kit of this size, it’s better for the parts to be loose than to be stubborn to avoid the risks of breakage, but having parts pop off whenever you fiddle with the kit is nevertheless an annoyance, especially when the part in question is a tiny gray index finger falling onto a carpet of the same colour. I really wish Bandai included fixed-pose hands meant to grip the weapons like the HG kits. Sure, I like the articulated hands as much as the next guy, but a more structurally stable alternative definitely would’ve been nice to have.
Final Say
When I first bought the kit, I certainly didn’t expect to be so engrossed in it. Sure, I knew the RG RX-78-2 would have some nutty articulation for such a little model, but I didn’t think the inner frame would be so different from what I’ve become used to in Master Grade kits. Nor did I realize the extent of the attention paid to the colours of the pieces, right down to the smallest details. Surprise led to fascination, and fascination led to attachment. As the model took shape, I knew I had to go all-out with the waterslide decals, and when I screwed up on a decal marking, I knew I had to buy a replacement sheet of decals and wait my two weeks for shipping. This sudden urge for perfection signifies a lot coming from a guy who never even bothered to decal his MG kits.
Simply put, building Real Grade RX-78-2 was the most fun I’ve ever had building a plamo kit in a long time. While its delicacy prevents me from recommending it to newcomers to the hobby, it is a no-brainer to anyone with even a little experience with model-building. Hell, even if you think you’ve moved past the hobby, I would strongly urge you to check out this kit, because chances are you’ll find something new and refreshing here to reignite your passion. Besides, at only 2,500 yen (the price of a higher-end HG-level kit), you can scarcely go wrong with this.
Pros
- Innovative and fun partially pre-assembled inner frame system
- Absurd level of articulation for a model of its size
- Impeccable colour separation
- Perfect Grade level of details in 1/144 scale package
Cons
- Fingers and skirt plates have a tendency of popping off
- Action base mount is practically worthless
- Grossly oversized beam saber blades




46 replies on “Review: Real Grade RX-78-2 Gundam”
That’s a very detail review. I agree this kit is really for experience model kit fans.
Hehe, detail is the name of my game~ This kit almost ran me haggard, though — so many things to write about! Even after skimping on the articulation talk, I think this is still one of the longest reviews I’ve ever written. 2,000+ words…that’s longer than most of my school papers. If only I had as much money to spend on this hobby as time.
Excellent. We appreciate the effort put into this review. Somehow Char’s RG Zaku IIs doesn’t appeal to me as much as the first RG. The pictures probably don’t do it justice. Love the light box work.
Thanks Petecorp, I appreciate your appreication =D! I’m not crazy about the RG Char’s Zaku II either. The part divisions give it a very fragmented look, which is somewhat messy overall. Maybe the lighting brings out the panel lines too much, or maybe it’s just we’ve had a long time to be familiarized with the 1:1 Gundam design than the updated Zaku II design. Still, it looks like a promising kit, and I can hardly blame it for not living up to the RX-78-2’s grandeur — I have a feeling that Bandai spared no expenses to perfect the 30th gunpla anniversary project of their poster boy.
Damn thing looks better then my PG…Nice work Chags! :p
Hehe, thanks Ash! You should really dust off the poor neglected thing and take it out for a few photos one of these days — I’d love to see your handiwork.
>Looks at the recent reviews list
>Chag: 5, Ashlotte:1
AHEM. =P
Quite a pretty kit, there. Even looks like you could have a ton of fun with the inner frame by itself!
I saw some at a con a few months ago and thought about picking one up. I wonder what Bandai’s plans for continuing this line are.
Yeah, the frame was certainly a load of fun to fiddle around with. Before I got started on the armour I had to force myself to put it away for the fear of wearing the joints out. I should really invest in one of those infinite bubble wrap keychains to occupy my hands whenever I get writer’s block. I’m sure the various objects within my immediate reach would be thankful for it.
As for Bandai’s plan for this line…isn’t it obvious?
RECOLOURS
RECOLOURS EVERYWHERE.
Sad, but most likely true. Personally I would really like to see a RG Hyakku Shiki, because both the HGUC and MG versions are pretty outdated. The sooner they get through their checklist of Zaku variants, the better.
I have a friend that’s like that. He won’t get a sliding mobile phone because he knows he’d slide it back and forth until it broke.
I guess I shouldn’t be expecting the RG line to start covering all the Gundam series for the millionth time so soon. Though, I suspect we’ll be seeing RG Unicorn soon simply because it’s current. But maybe Gundam Musou 3 will prompt some new stuff of the Musha Gundams.
Bandai must keep a lot of engineers shoved in cubicles to be able to keep pumping out new kits and figures for all the lines they have now.
I should be grateful I don’t live in the states. I can totally imagine shooting myself in the ass after playing with a loaded pistol when bored.
Unicorn, eh? A fully-transformable 1/144 scale Unicorn would certainly be a great way for Bandai to flex their muscles, though I dread how fragile it would be. But if anyone could do it, it would be Bandai’s engineering department, the endless cubicles of which must be manned by magical elves poached from the north pole. By the way, speaking of Gundam Musou 3, I’m pretty disappointed that there is no new Musha Gundam this time around. A Nu Musha would’ve been so sick.
I was expecting a lot from the Real Grade line and it shows. Just by looking at the model, it’s kind of similar to the SHCM-pro of the RX-78 but with more details.
The only thing that’s stopping me from buying the Real Grades are the decals and how small they look. Decals are one of my favorite things I like doing and take time doing them, but it looks like you’ve got to invest a bit more and some insurance (extra decal sheet) to make sure you get it all right.
Overall your model looks fantastic and I hope Bandai continues to do more RGs.
Yeah, I feel that having an extra sheet at hand makes the process noticeably more enjoyable. Playing operation with tiny waterslides is less nerve-wracking when you know you have a safety net to fall back on, which in turn helps prevent accidents in the first place.
Thanks dude! I hope Bandai goes on to do great things with this line. I think it occupies a comfortable niche in the gunpla market between HG and MG, so hopefully it will go on to become a full-fledged line of its own rather than a gimmick for the gunpla 30th anniversary. I am also very curious as to how far the Real Grade engineering can go. A fully transformable 1/144th scale Zeta Gundam would be a pretty amazing feat!
great review and gerat job on your RG
I have mine as well, its a great model kit, the build is scary though, especially when loosening the preassembled legs, i thot I’ll break them, I might get RG ZAKU II
Thanks Kevin! Though I always like reading compliments, but I appreciate them even more when they are aimed at a kit that I’ve put the most work into. I’m super glad that you guys seem to like what I did to the kit, even though it’s just a straight build =)
I know what you mean, hehe. Everything felt so foreign when I first held the inner frame runner. In retrospect, the fear of breaking the parts was also pleasantly exciting, at least for me. But after this experience, I probably won’t feel the same excitement on my next RG project…kind of sad, ain’t it?
hahahaha, yeah straight build is good, I’m pretty much still a noob, just ordered 3 cans of top coat for my PG strike gundam, first time top coating, soo excited
Cant wait for bandai to release something like RG Nu, even though itll take a while for them to release that, lol. I guess they’ll release something related to OYW first like GM, gelgoog, etc
Ooo, a PG? That’s one hell of a way to inaugurate a “noob” — good luck, dude! =D
Hmmm, I wonder what directions they’ll go with this line. I have a feeling they won’t announce RG releases as often as HGs and MGs, so maybe they don’t have the luxury of time to tackle the less popular OYW grunts. I’d still expect to see GM, only because it’s so similar to the Gundam, but I’d be skeptical if someone told me a RG Gogg or Acguy is in the works =P. Nu and Sazabi seem like inevitable entries to this line, so the only question is “when”… here’s hoping it’s sooner rather than later!
Holy… That’s what a mecha toy should be! 😀
The skeleton looks as if it was adopted from the innovations found in the dollfie dream line, which is also entirely articulated by an internal frame.
http://www.flickr.com/groups/dollfiedream/discuss/72157622421411369/
To make the shoulders swing forward, it looks as if you would have had to allow for some separation between the shoulder block and the chest block when the shoulders are in the neutral position. That way, you could use two hinge joints to pull the shoulders forward until the shoulder and chest blocks meet. Bandai probably could have disguised and strengthened this area with a thicker cross section of plastic in the parts connecting the shoulders to the rest of the body.
http://www.flickr.com/photos/34366571@N06/5288983933/
Those shoulders look remarkably stable. The amount of friction at the shoulder joints holding up those big widespread arms seem confined to a very small surface area. I really love this soft plastic! I used to have some hand-me-down GIJoes produced by Hasbro and I remember how quickly that hard plastic sanded away and wore out the joints. The lower legs of GI Joes would swing loose within hours of play.
I find these four shots, in particular, exciting.
http://www.flickr.com/photos/34366571@N06/5289602770/
http://www.flickr.com/photos/34366571@N06/5288988575/
http://www.flickr.com/photos/34366571@N06/5289594038/
http://www.flickr.com/photos/34366571@N06/5288987661/
That’s because no Figma can strike the poses this chunky mecha makes in these pictures.
Alas, it is probably impossible to stick a skeleton into one of those $30 articulated toys, which is what I mainly collect, though I think there are ways to cheat and allow what you see here.
I think I would add another wish list to your point about the inclusion of hands with fixed grips for weapons. At the price they are selling these toys, Bandai should try to include wrists that are bent toward the pinky. These grips would allow the mecha to point and stab with his blade weapons. It does not seem that the wrist articulates much in that direction.
http://www.flickr.com/photos/34366571@N06/4810030040/
I don’t know why any articulated toy today featuring swappable hands should not include these.
Finally, I want to say that what really strikes me about your photography is how well you light the pictures with the pitch black background. My main monitor is a Samsung S-PVA Dell Ultrasharp. This means that your blacks appear rich and deep. How do you make that black background? They’re gorgeous! I just learned how to photograph your other backgrounds. But the black appears infinitely deep.
An interesting difference between the dollfie and the gundam skeletons is the placement of their “thighbones.” The thighbone of the Gundam is behind the shinbone but in front on the dollfie. They seem to address different issues raised by the knee joint. The dollfie has to account for the bulge mimicking the “hamstrings” and “calves” but the Gundam has to account for the knee shield plate that juts forward.
Still, the Gundam’s leg bones are fairly straight and it also has “hammies” and “calves.” I guess the Gundam benefits from the expectations of a gap opening in the front of the knee as it bends.
Pretty interesting problems and solutions. 🙂
On the shoulders: yeah, pulling apart the shoulder block and the chest was thing first thing that came to my mind as well, but unfortunately the shoulder peg is not long enough to allow for any significant leeway. But considering the model can pull off the 2-handed beam rifle pose with relative ease, perhaps I’m being too hard on it. While it does get in the way of some melee poses, it’s far less of an obstruction than the oversized beam saber blades. Besides, it’s bloody tiny!
Oh the wrists: I am glad we think the same way about the forward-bent wrists, because it’s one of my primary complaints against plamo kits in general. I made a stink about its absence in my MG Exia review, and I’m pretty sure I talked about it in one of the early Figure Highlights (back when it actually covered non-bishoujo figure stuff). Perhaps the worst thing about it is the fact that Bandai is perfectly aware of this flaw, because they sell sets of resin-cast hands at extremely high prices. I’m talking ~2000 yen for a set of 1/144 scale hands. They probably know damn well that the lack of forward-bent wrists is not enough to turn people away from their products, and thus decided to milk the hardcore fans with these B-Club parts. They are a bunch of crafty devils.
On the articulation of models vs. poseable figures: mechas have it easy compared to bishoujo characters, mainly because they can get away with a lot more part divisions. Slap a few too many joints on a figma, and you risk ruining the image of the character, whereas more part divisions on a mecha model equals more mechanical detail. Still, gunpla is a very “cost-efficient” hobby — provided you have time to invest in them. The amount of detail in this 2500 yen kit leaves any Figma or Revoltech in the dust. Thesame goes for Master Grade kits and scaled bishoujo figures. Sure, you have to assemble and detail the kits yourself, but if the process happens to be fun for you, then it ceases to become a drawback. This is why even though bishoujo figure content vastly overshadow mecha stuff on this blog, I would give up the girls before I give up the bots.
Hehe, thank you for your compliments on my photography! Truth be told, my process is pretty crude. All it takes is a pair of desk lamps and light box that I bought back in China for around 15 bucks. The box comes with an assortment of backdrops, all of which have a side covered with felt. This means light does not bounce off of the backdrop as much as paper. But it also has its drawbacks — there are fold lines all over the backdrop because it’s packaged that way. To counteract this, I place the subject farther away from the back wall and try my best to avoid pointing the lights directly towards the backdrops. Also, dust gets caught in the felt very easily and is hard to remove. I go over the felt surface with a lint roller before I start shooting every time, but it’s never enough to fool the eyes on close inspection. This is why I reverted back to paper for part close-ups. I’ll take a few snaps of my setup next time I shoot photos. When I have a new review up, go to my Flickr photostream and you should find it there. =)
I see I was looking at the wrong Gundam kit online! I can’t believe this costs the same as a Figma! >:(
I think Max Factory feels that they have done the best they could do with the materials at their disposal. But I really do think there may be ways to increase the range of motion on their line. Instead of a skeleton, like on the Gundam here, I think they should wrap a thin piece of soft plastic tightly over a harder plastic interior, but in a way that leaves space around the joints. The space would allow the thin soft plastic to deform easily, which may allow greater range of motion. The trick would be to hide the gaps you would need to allow the soft wrap to deform properly and easily. I think this is feasible.
2000 yen for just a set of hands is not very appealing. What I would do is include more enticements and make supplemental kits an actual part of the normal purchasing practice of consumers. For Gundams, I think selling battle damaged parts, extra parts, and other accessories as a secondary kit could be economically viable, increase consumer loyalty and excitement, and sell more toys. This way, it may be that for every primary kit sold, Bandai could double the sales for a certain, possibly large, percentage of buyers.
I think this is what Max Factory should do, also. Figmas, because they are mostly representations of girls, could benefit from alternate hair styles, for instance. You could also sell a greater range of hand poses. And you could also sell more faces and forelocks that are different from those included in the primary box. Plus, more interesting accessories would be nice, too. Both Figma and Gundam consumer bases seem ready and willing to consume such secondary kits.
BTW, who does RX-78-2 prefer? Drossel? Or Aigis? I wonder if he feels intimidated by Aigis’s height. :p
And yeah, I would like to see your photography setup. 🙂
Since I’m not in the biz of making figures, I’m not sure how feasible the soft skin idea would be. How easy would it be to paint? How durable would it be? Is it going to be cost-efficient? Would it work well for complicated costume designs as well? Still it’s a very interesting idea, and if any other figure company is brave enough to challenge the Figma hegemony on articulated bishoujo figures, they would be wise to consider your idea.
As for the extra parts for Figmas, I think Max Factory already has a pretty effective strategy for it. The Haruhi and Lucky Star Figmas often came with extra parts either designed for or is compatible with other figures. For example, the battle waitress Mikuru came with Kyon’s reindeer head, and all the summer uniform LS girls came with heads of the underclassmen, which can be fitted onto the winter uniform versions as well. While it would be nice if Max Factory started selling accessories separately, it’s probably not the most financially feasible thing to produce add-on packs for goods that are produced in limited quantities.
As for Gundam’s preference: that’s a tough one. While Drossel design is probably close to the preferences of a blocky robot, that ojou-sama attitude would rub him the wrong way. On the other hand, Aigis is obedient and loyal, two traits that should be very appealing to a military man. I’m sure Gundam can put aside his Napoleonic complex for her, hehehe.
Yup, the real grade will definitely bring a new experience in Gunplaing. The awesome color separation would also bring joy to those who didn’t have time to paint their kit 😀
Yep! It’s a great way for the skill/resource deficient modeller to get a taste of higher-end modeling. It still amazes me how a 1/144 scale kit is able to top Master Grades in terms of colour separation.
Wow nice detailed review! I was really excited about the prospects of the RG line when it was first announced and I’m really glad to see that they did not disappoint. Really great to see the amount of color seperation, good for noobs like me who don’t have any kind of paint set-up. Not really a fan of the oldold school Gundam and Zaku designs though so I think I might be waiting a bit.
Quick question on water decals. I worked with them for the first time recently and got them on OK but then had a problem with them falling off afterwards. Do you top coat your model after decaling or add any extra steps? Or if I leave it to dry for awhile, its good to go?
Thanks Luthren! To answer your question on the decals: the adhesiveness of the waterslide decals is all that strong, so they will fall off if you’re not careful. In addition to top coating the model afterwards, I applied Mr. Mark Setter (a liquid solution) onto the surfaces before applying the decals. The solution makes the waterslide softer and stickier, thus making it less likely for the decal to fall off. Mind you, the solution isn’t foolproof, as you can still scratch off the decal by accident. While I’m not too experienced working with these decals, I would recommend using both measures just to be safe. A bottle of Mr. Mark Setter is very cheap and would last a VERY long time, and top coat is just nice to have for a variety of reasons. Considering how meticulous the process of applying these decals is, I’d rather be safe than sorry! =)
great detail for small kit and yeah that beam saber looks oversized Nice review and Happy New year 😀
I’ve got one too, but I’m not so excited about it for the moment. It’s built, painted for some details and it’s waiting for its panel lines, water decals (I’ve gone for that too !) and topcoat, but the pieces falling off (index, skirt, some parts on the legs) and the overall frailty is kinda turning me off (yes, even though it’s my current twitter picture ;p).
I also broke some part in the leg while building it, and it’s now glued back, but it inspired me fear with manipulating articulations :'( The arm also got some trace of stress where it bends.
Maybe I’ll appreciate it much once it’s finished !
As for your review, it’s well done and I love your photos ! I definitely should search for a lamp and some paper/cloth to make my photos better (well, as good as a compact digital camera can be :p). You didn’t mention how beautiful the box is ! And for your action base problem rrobbert184, on youtube, had the same problem in his review …
Yeah, I know what you mean. I think you’ll come to like the kit a lot more when you know you’ve gone through the rigors of construction, in which the threat of breakage and lost parts is always present. Taking photos of this thing was pretty nerve-wracking for this very reason. By the time I sat down to write this review, I was in a much better state of mind knowing I won’t have to fiddle with the kit anymore. I think when it comes to models, the more nerve-wracking the construction process is, the more attached you would be by the end of it all. Good luck dude! =)
I didn’t mention the box because I had crushed it when I accidentally stepped on it ^^; It’s a very handsome box, to be sure! I’m relieved to know to know I’m not the only one frustrated by the action base mount. I kept on doubting whether or not I’ve put the part together properly, because it seems very strange to me that Bandai should screw up so badly on such a simple-looking part. Does it work for you, Gressmon?
Well, I still haven’t bought an action base for my models, but I’ll let you know once I’ll have one :p
Alright, I’ve finally tried the action base with the mount part, and it’s definitely crap, period.
As for the kit, I’ve finished it and love it with all the decals and top coat, very very nice !
BTW, you should use mark softer for decals, as it melts the decal with the plastic and reduce the risk of having them slipping off, it’s a must have when dealing with water decals !
like in HG 1/144, does some parts still needs to be painted?
Nope, unless you count panel lining as painting, of course. It’s completely colour-accurate out of the box. =)
What kind of top coat did you apply (at the end of decaling?)? flat?
So for the decals, mark setter?
Do i need also mark softener or setter is good enough?
What about the gold stickers on the vent panels on the chest? Do you think those could be painted gold? or the stickers are good enough?
Thanks 😀
Like all of my other builds, I used flat top coat for the RG Gundam.
I did not use mark softener for this build, though I think I should have. A few decals managed to slip off even after applying the setter. I’m not sure how much of an effect the mark softener has, but considering that each bottle isn’t too expensive and can last you a long time, I strongly recommend getting both if you think you’ll be using waterslide decals with any regularity.
The vent would probably look better if painted gold. I think they look fine with stickers, but I think it would look neater with paint. Alternatively, you can just leave them yellow and it would look fine as well!
Hope this helps, Erick! =)
Thanks for the answer, this kit seems overwhelming, but I will try it (it should arrive on two weeks from japan)
Me and my wife usually build this kits together (I build, she paints), so this one looks like fun. Thanks 🙂
Out of all the kits I’ve built, this is the only net I would not recommend to a complete newcomer because of all the small parts and its overall fragility. But for anyone who knows the value of patience and an organized workspace, this kit is an absolute blast. I wish you and your wife a pleasant build! 😉
Mark Softer is an absolute must have for water decals !
Setter helps making the decals positionable for a longer time, whereas Softer kinda melts it with the plastic.
I used to use both but I find the Softer to be the most important of them, I think it also help a lot to avoid silvering. You can easily see if you decal if correctly “melt” with the plastic, and if not you can apply more to correct that.
Shucks, now I REALLY regret not getting a bottle of softener. Thanks for the heads-up, Gressmon!
Excellent review there. I’ve just stumbled on your blog to check out your reviews and I find it very good due to the details you put in them. Plus the images you took are great.
My first RG kit was the Aile Strike Gundam and I can relate to all those qualms regarding the fragile inner frame. I’ve even searched for blog entries of people who built the kit to get an initial overview (and to avoid breaking the parts that would definitely make me go RAGE!).
After my first build, I’ve decided to collect these RG kits (though I’m still skeptical on the Zakus, sorry but I’m not yet too acquainted with the UC mobile suits). Heck, I’m not even a fan of the old RX-78-2 until they introduce it to the RG line.
Haha, I definitely remember the the first time I tried to move the inner frame well — it was like playing Russian roulette. Even though I knew where they’re supposed to bend, there was still the linger doubt that my $30 investment would snap like a dried-up twig. It was thrilling, in a way!
The Zaku II is probably my favourite mobile suit ever, but for some reason I never warmed up to the RG kit all that much. Maybe it’s because I already have a MG of it, but in my mind, the Zaku II’s charm lies in its simplicity. When you throw in tiny panels everywhere onto the design, that charm is undermined somewhat. Don’t take my word for it, though — give the original Mobile Suit Gundam a try. If you can get past the dated visuals, there’s a great story to be had there. You might even fall in love with the Zaku II by then end of it!
Should have posted a picture of the packaging so new comers dont get confused and get the right one. Its always good.
NIce job!
You should submit this review to Amazon. The so-called most helpfully review is by a long winded douchbag who says they got the shoulders all wrong and the head is too small. Obviously doesn’t know about 1:1 Gundam. What kind of fan is that? Also obvious, that he wouldn’t be able to concede his own errors. And this coming from a POSITIVE review. Douchbag… Thanks so much for the best review in this alternative timeline (real life is too screwed-up, can’t possibly be canon).
Sorry for the double, this network sucks.
You should submit this review to Amazon. The so-called most helpfully review is by a long-winded douchbag who says they got the shoulders all wrong and the head is too small. Obviously doesn’t know about 1:1 Gundam. Big fan he is. Nothing quite good enough for him, and this coming from a POSITIVE review. Douchbag… Thanks so much for the best review in this alternative timeline (real life is too screwed-up, can’t possibly be canon).
I don’t know, maybe I’m just being a dick too, but now that I’ve put my money down but I’m still waiting, two things come in my head; your fantastic review, and then some guy basically saying that this kit is ok as a gift. Sorry
Based on this positive and detailed review i got myself both the RX-78-2 and Zaku II kit at my recent trip to Japan. Thanks for much for the effort you put in this post!
Will do a few more HG kits before tackling this beauty, incl. decals 🙂